Friday, June 13, 2014

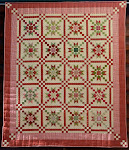
Machine Quilting Emilie Elizabeth

Hello Everyone,
 
I've been at the long arm for the last couple of days working on Emilie Elizabeth.  This quilt was telling me she wanted to looked old fashioned.....and she is.
 

I marked the quilt first using a Frixion pen.  It is okay to use them on light fabric, but don't use them for marking dark fabric.  When you press it to remove the marks, they disappear on light fabric, but they will leave a white line on dark fabrics.  I press right on the long arm with my applique iron to remove the lines as soon as they are quilted.  I don't let the marking sit there for days. I have also removed the lines using a blow dryer.


I didn't realize how many different elements were going on in this quilt until I started quilting. 


It is always so hard to get a picture.  I have to wait for the afternoon sun to shine in the window to get a halfway decent picture.


The corner blocks.


Borders and little inset border.


No post would be complete without a picture of Mazey.  This is our granddaughter Kinsey giving Mazey some loving.  The twins want to come over everyday......and it's not to see their Grammy and Poppy! They play with Mazey until she collapses with exhaustion.  I think I need to hire them to tire her out every evening so she will sleep through the night.  Last night was successful,  Mazey slept the whole night without nature calling!

 
Soon,
A Sleepy Lynn

Wednesday, June 11, 2014

Sew'n Wild Oaks Class is in Session

Hello Everyone,
 

It was another fun and productive day for my girls in the Sew'n Wild Oaks class.  We all learn from each other, and yesterday Paula showed me how she makes her adorable, itty bitty flowers.  It's the tiny one under the yellow petals.


Her flower box for Party in the Garden is going to be filled with joy.


Barbara is stomping out some clusters of grape hexies for her Once Upon a Vine.  She will be camping soon, and wanted a portable project to take while she's without power.  Hexies are a perfect project to take camping.


All of the little white veins on each of the leaves were hand embroidered by Melody.  My girls are really into adding fabulous details in their projects!


Susan, on the right has her gorgeous quilt top together and is now thinking about adding a special Seminole border to her 3-D Noughts and Crosses designed by Quilt Sue from her Pick Four book.


Karen is making her double flying geese to add to her Christmas quilt.  The plaid is just right for her center section.


Gail finished another block for her Nostalgic Christmas quilt.  Wonderful use of plaids and color is this block.  Note her precision, not a point was lost in the making of this block!


Melody has recreated a fuchsia for her Harvest of Hope quilt.  I love the plaid leaves!


Isabelle's top section for Harvest of Hope is almost finished!  Her colors are gorgeous and her grapes look good enough to eat.


Barbara has completed lots of pastel baskets for her spring version of For the Love of Baskets.  She has quite the stack of baskets completed for this one.


Barbara B is adding to her Country Corner blocks.  The block on the left is the design I'll be offering on the 2nd Tuesday of next month.


This is Susan's block for next month.  Susan got a gold star from the teacher since she found an error in my instructions.  This is why I like to have the girls work through them first, before I put the cutting directions out for the world!

 
All of this loveliness is being brought to you by this talented group of Sew'n Wild Oaks girls.  AND, we now have a mascot!  Mazey the mascot is getting cozy with her Auntie Gail for the photo.  Mazey loved all of the attention she received from the girls yesterday.  Wouldn't it be wonderful to walk into a room and have everyone swoon and tell you how cute you are? 
 

The Sew'n Wild Oaks talented girls!
 
Now if I could just convince one of the girls to take her for a sleepover at their house!  Someone, and I won't mention any names, (me) left the crate door unhooked last night and we had a very quiet escapee enjoying freedom in the whole upstairs.  I'm still on the hunt for little presents that she left us. 


Soon,
Lynn

Tuesday, June 10, 2014

Country Corners Month #1

Hello Everyone,

It's the 2nd Tuesday of the month and that means it's Country Corners online BOM.  You don't need to sign up, you can just follow along if you'd like.  I will post the cutting directions on the 2nd Tuesday of every month. 

This month you will be making the components for a 9" block that could look like this.  My friend Susan made this beautiful block last month while she was testing out the directions.


You can use the cutting instructions listed below, and follow along with the piecing techniques in my Patchwork Math book.


You will be in the driver's seat for this block of the month.  I will give you a cutting guideline, you decide how you want to arrange the components.  If you have the book, you can use the formulas and make the blocks larger or smaller.....you choose.  You also choose how many blocks you would like to make.  Do you want a small quilt or a king-size.....again, it's up to you.  (Fabric packs for this colorway are available HERE.)


We will be putting a quilt together by the end of the year.  I'll be using all reproduction fabrics in my blocks.  I'll decide how I'm going to set them a little further down the road.  I have a couple of ideas, but nothing is firmly set in cement.

You may decide on something entirely different, and that is great!  Be creative, use the cutting guidelines and just GO FOR IT!

The number in ( ) denotes how many pieces to cut

Half-Square Triangles – (8) Directions on Page #4
   Cut (2) 5” x 5” squares – (1) dark and (1) light background

    Trim to 2” x 2”

   Finished size will be 1-1/2” x 1-1/2”

Square in a Square – (1) Directions on Page #12
Cut (1) Base 2-5/8” x 2-5/8”  Fussy cut an attractive center

 Cut (2) Corners 2-3/8” x 2-3/8” a complimentary color

Trim to 3-1/2 x 3-1/2”

 Finished size will be 3” x 3”

Flying Geese – (4) Directions on Page #17 
Cut (1) Goose 4-1/2” x 4-1/2” from dark fabric

Cut (4) Wings 2-1/2” x 2-1/2” from light background

 Trim to 3-1/2” x 2”

 Finished size will be 3” x 1-1/2”

Double Flying Geese – (4) Direction on Page #19
Cut (1) Goose 4-1/2” x 4-1/2” from dark fabric

Cut (4) Wings 2-1/2” x 2-1/2” from light background

Cut (8) Sky 2” x 2” from red

Trim to 3-1/2” x 2”

Finished size will be 3” x 1-1/2”

Squares
Cut (8) 2” x 2” squares from light background
Square in a square, double flying geese, flying geese and half square triangles
Here are some of the variations you can put together using the different quilting components.  The choices are endless.  You can use the same fabric, but change up the placement, and you have an entirely different block.  You could make a whole quilt using only the components above.  Just vary your fabrics and placement.


The 2nd Tuesday of the month is when my Sew'n Wild Oaks class meets at In Between Stitches.  A couple of the girls made the following blocks during class last month to test out the directions for me.  They brought their own fabrics and made some beautiful blocks.  Again, all of the same components as outlined above, and look at the difference!


This morning, the Sew'n Wild Oaks girls and I are meeting at the shop for our monthly class.  You virtually join us today and be part of the group.  Some of them will be working on Country Corners right along with you.  If you don't have a blog, I'd love to have you send me pictures of your blocks and I will post them so everyone can see the infinite possibilities of quilting with components and making a Country Corners quilt.  If you have any questions, please email them to me at patched55@comcast.net and I'll get back to you as soon as I can.
 
Soon,
Lynn
 
P.S. NMSue please send me your email so I can thank you for all of your comments.  You are a "no reply" status and I can't thank you personally.