

.JPG)


BUTTERSCOTCH BASKETS
ONLINE TUTORIAL
Welcome to the online tutorial for Butterscotch Baskets. Whether you are making the BOM or selecting your own fabrics, this tutorial is a companion to your Butterscotch Baskets pattern. I've not listed the sizes you need to cut, those are in the pattern and I will refer to the correct page number for cutting instruction. (Pattern sales help to fund my retirement, so I can't give the farm away!)
 |
| Photo credit to Quilt Haven on Main Hutchinson, MN |
When I was first putting this tutorial together, I keyed in the word 'flock' instead of block. In a way, you will be making a flock of blocks! Enjoy the process. Don't rush. Be accurate from the very beginning. The end result will be a quilt that you will be proud to have in your home, or save as a gift for an important person, couple or event.

If you are following along with a BOM program, you will be making 16 blocks per month. You will make FOUR different blocks per month. You will make FOUR of each of the following blocks. Now aren't they nice looking blocks! From blue to a deep rust, dark pink and green, the Autumn Landscape fabrics designed by Lynette Jensen for RJR fabrics work beautifully together.

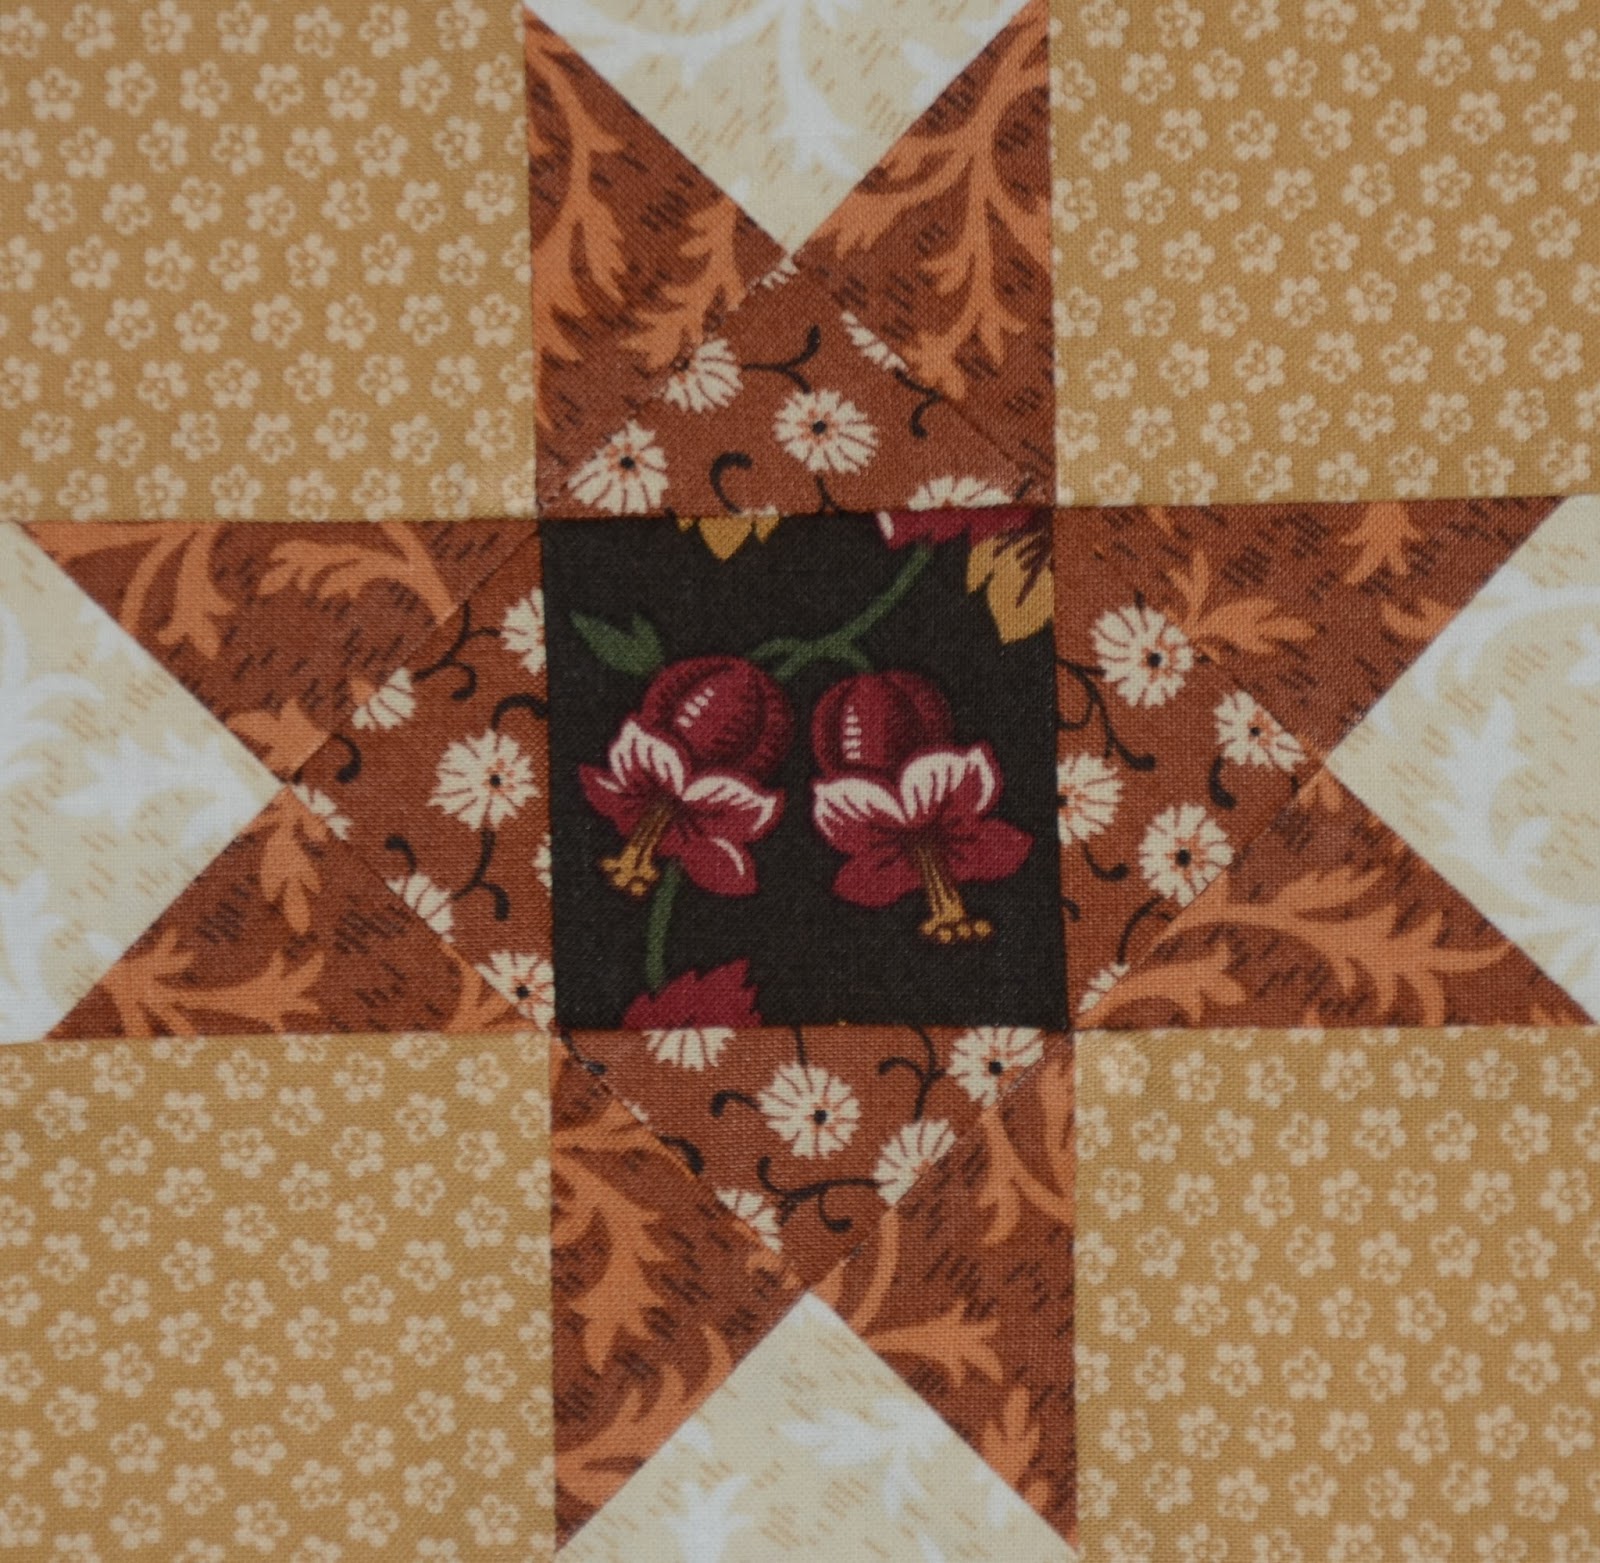
LESSON ONE - THE BLOCK
Let's begin by making the first block.

Here's what you need to cut to make FOUR blocks. Refer to the graphic on page #1 of the pattern to see where the parts and pieces are located in reference to each other. (They all play well together!)

LESSON ONE - THE BLOCK
Let's begin by making the first block.
Here's what you need to cut to make FOUR blocks. Refer to the graphic on page #1 of the pattern to see where the parts and pieces are located in reference to each other. (They all play well together!)

The sizes you need to cut are listed on page #1 & #2. Below are the amounts you will be cutting.
Cut (4) A - block center
Cut (16) B - corner squares
Cut (4) C - inside connecting triangle that touches the block center
Cut (4) D - outside triangle
Cut (8) E - star points
You will be making quarter square triangles with C's, D's, & E's. Lay the (8) E's out, right sides facing up. The E's are usually the darkest fabric in the grouping. They form the star points in the block.

With right sides together, place (4) C's and (4) D's on the top of the E's.

I love, and use my Omnigrid 1/4" ruler more than any tool in my quilting toolbox. Place the ruler on top of the unit with the center line running from corner to corner. Draw a line on each side of the ruler. I use a Frixion pen for marking because it has a nice sharp point and it disappears when the iron touches it.


Pin the units together.

Stack them up and take them to your machine to complete the chain piecing. Stitch DIRECTLY on the line.

Place a ruler from corner to corner between the stitches.

Cut them apart.

You will go from 8 units to 16 units.

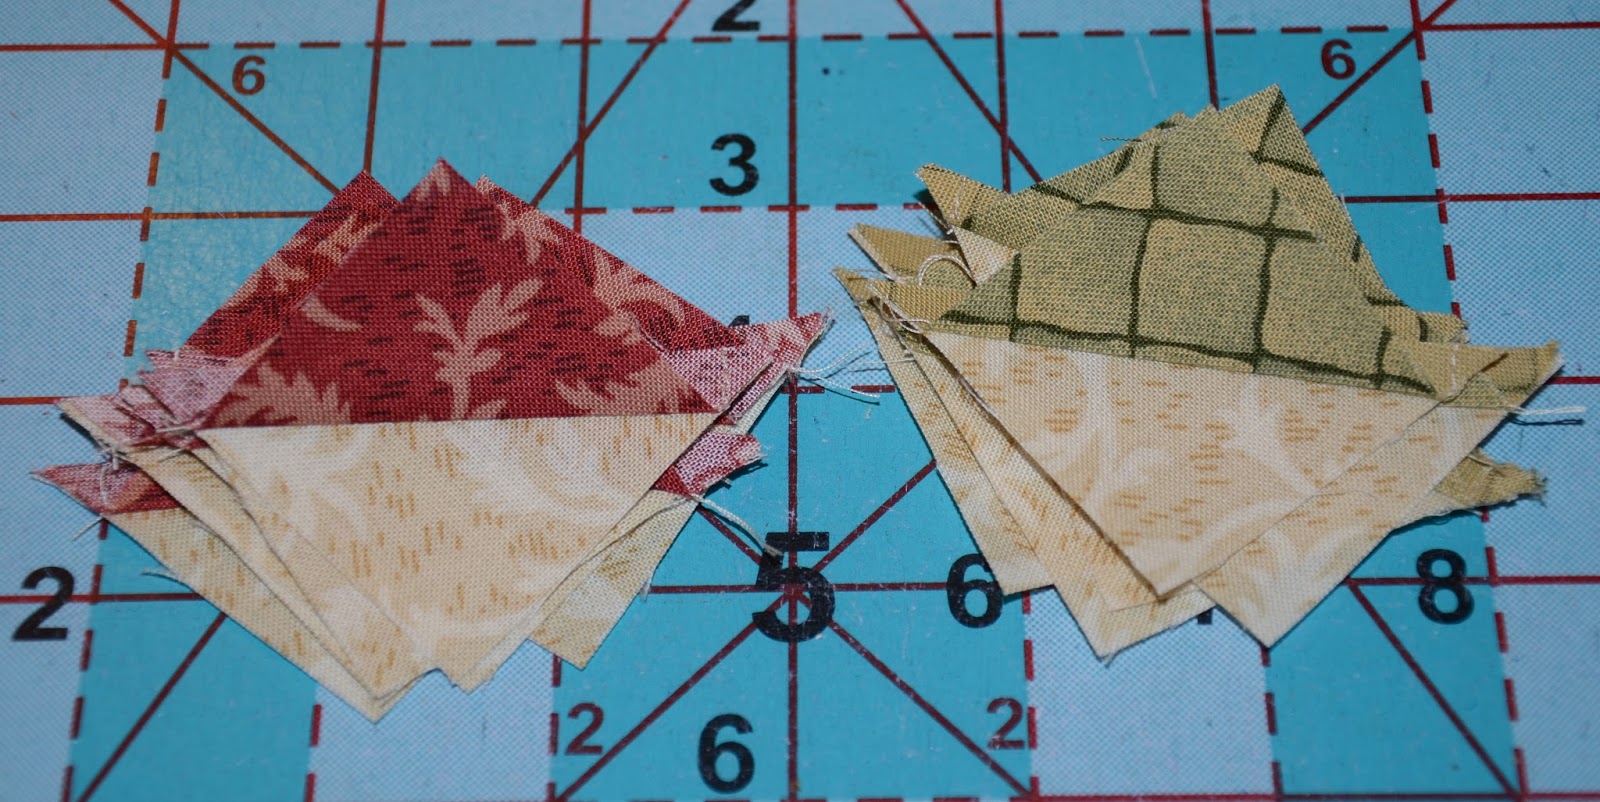
Press the seams toward the E piece. ALWAYS press toward the E for all of the blocks.
You will have eight units that look the like one on the left, and eight units that look like the one on the right. They should measure 2-7/8" x 2-7/8"

Take the unit on the left and place it directly on top of the unit on the right. Since you've pressed toward the E, the seams will 'lock' together. Try to wiggle them first to make sure they are locked.

Peel it back just to make sure the E's are opposite each other. I'm telling you to check this from first hand experience. I would never sew them together incorrectly!! Insert wink here.

Now use that little 1/4" ruler again. Line the center line up exactly corner to corner. Mark along the line then stitch directly on the line.

Cut it apart between the stitching lines.

Do the little twisty bit in the middle by pulling out a few of the stitches that go all the way to the seam, and twist with your thumb. Press one seam down, and one seam up. This removes a lot of the bulk and the unit will be nice and flat.

There you go. Trim off the dog ears and you will have 16 units that look like this. They should measure 2-1/2" x 2-1/2".

Lay the parts and pieces out for (4) blocks. Follow the stitching and pressing directions on page 12.

In a perfect world, the block should measure 6-1/2" x 6-1/2".
There, four blocks done, 76 more to go. I didn't want to tell you in the beginning that you have to make 80 of these little guys. I didn't want you to go fleeing from the room!
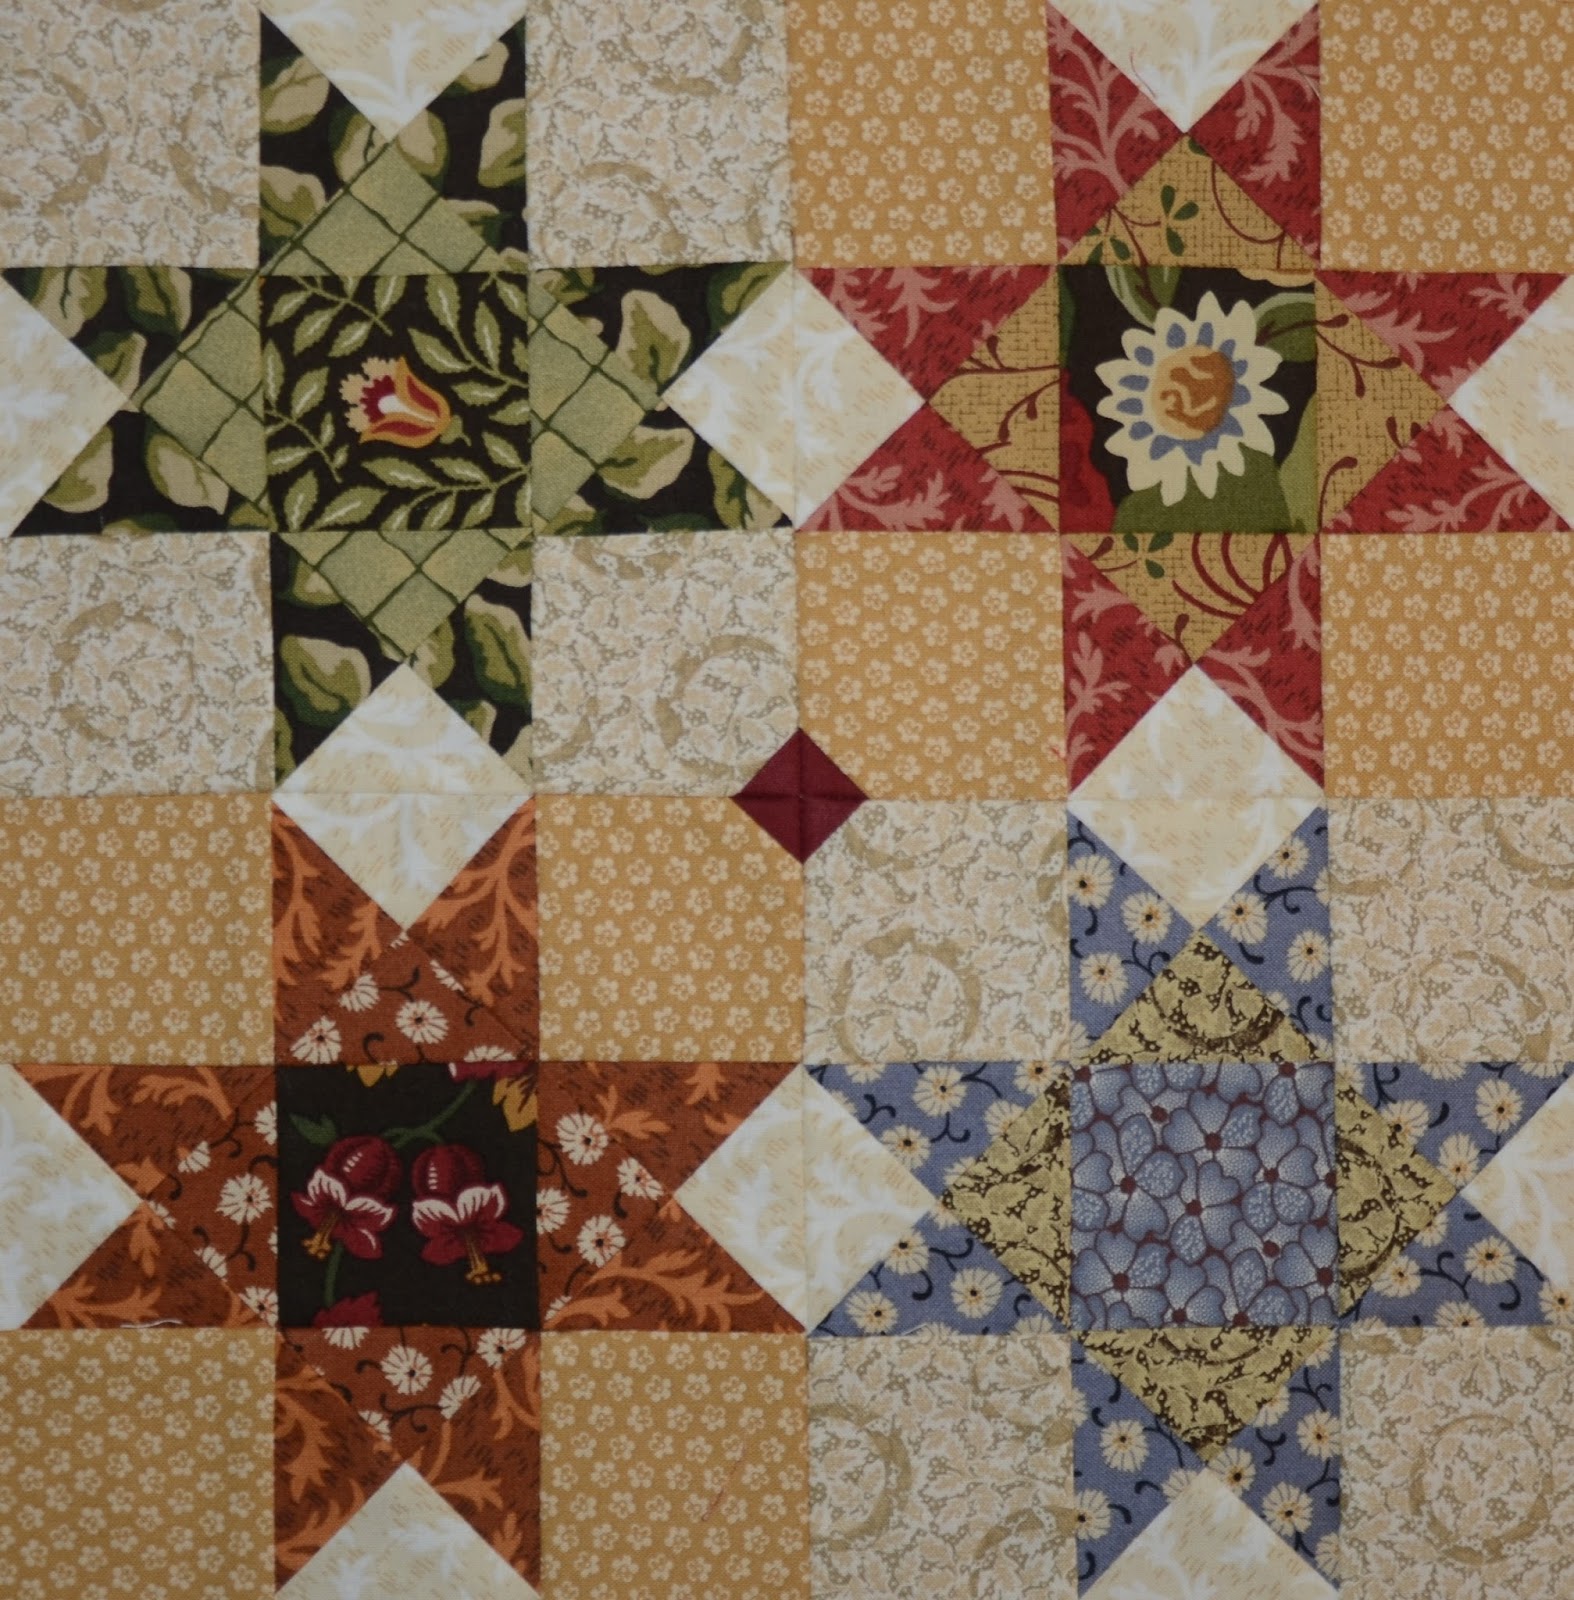
Now make 4 of each of the following blocks for a total of 12 more blocks. Notice the fabric used in the corner squares is different in two of the blocks. Notice the fussy cut center blocks. All of the attention to detail pays off in the end product.


Keep yourself organized and you can most likely make 12 blocks at the same time.

Baggies become your new best friend.

LESSON TWO - THE LITTLE RED BUTTON CENTER
Arrange your blocks in 4 groups of four blocks. Before you can sew them together, you need to add the little red button in the center. Pay close attention to the arrangement. See how the matching corner fabrics are diagonally across from each other?
Don't worry, I'll walk you through this process. Yes it takes extra time but it is worth the effort.
First cut (16) squares from the maroon. Refer to page #13 for cutting directions. Mark a line from corner to corner on each square, then pin to the block.

Stitch directly on the line. Trim 1/4" away from the seam.

Press two sides toward the maroon and two sides toward the lighter fabric.

Now when you sew the four blocks together, the little red squares will lock together. You will end up with four groups. Press in the direction of the arrows on page #13.
Set aside and get ready for months 2 through 5.
LESSON THREE - THE BASKET BLOCKS
Refer to page #14 to cut out the parts and pieces for the basket blocks. This section of the tutorial will cover how you make (8) half square triangles at a time.

Refer to page #15 to begin construction. Place H - D right sides together and E - C right sides together.

Using my favorite 1/4" ruler, mark like this.

Stitch directly on the lines.


Then cut horizontally across the units.

Then cut diagonally from corner to corner.

Trim to 1-1/2" x 1-1/2".

Place all of the parts and pieces on the block layout sheet, page #16. If the pieces do not fit on the sheet, then you shouldn't use them as they are not the correct size.

Follow the directions to construct the blocks on pages 17-19. The block should measure 5-1/2" x 5-1/2".

Now it is time to add the frames around the basket blocks. After all of your hard work, now comes the easy part. Follow the cutting directions beginning on page 20.
Here are a couple of hints:
CUT THE LARGEST STRIPS FIRST
Always press in the direction of the arrows
The block will measure 12-1/2" x 12-1/2"

LESSON FOUR - PINWHEELS
Follow cutting directions for pinwheels on page 22.
You will be making HST (8) at a time.

With right sides together, mark. Stitch directly on the marked lines.


Then cut horizontally.


Then cut diagonally.

Trim the HST to 3-1/2" x 3-1/2"

I use a Bloc Loc ruler for my trimming

Sew them together according to the directions at the top of page #23. Press in the direction of the arrows. The pinwheel block should measure 6-1/2" x 6-1/2".

Cut the setting triangles from the directions on page 23.
Lay the first triangle, RST, on top of the pinwheel. Stitch with the triangle touching your sewing machine. The pinwheel will be on top. Always have BIAS on the BOTTOM when stitching.

Press in the direction of the triangle. Then place the next triangle on top of the pinwheel.

You will have 14 triangle units that look like this.

LESSON FIVE - PUTTING IT TOGETHER
Refer to page #24 and this diagram to lay your completed sections together. Begin with month #1, and work your way across and down the quilt. Take a good look at the pattern that is developing.
Stitch the rows together diagonally. Press rows in alternating directions.

Once the quilt is together, stitch the corner squares to the quilt.
I totally forgot to take a picture of trimming and squaring up the quilt once all of the blocks are sewn together. Sorry. Refer to the graphic on page #25 for trimming information. The quilt should measure approximately 67-1/2" x 84-1/2".
LESSON SIX - STRIP SET BORDERS WITH MITERED CORNERS
Following the cutting directions on page #25 and make 2 strip sets for the sides, and 2 strip sets for the top and bottom. Diagonally piece the strip together to form the entire set.
MAKE SURE YOU FOLLOW THE PRESSING DIRECTIONS
The backs of the strip sets will look like this. For the sides, press the strip sets toward the red fabric.
For the top and bottom, press the strip sets toward the light fabric. This is important so the borders will nest together when mitering.

After pressing, trim up the edges so they are nice and even.

Find the center of the quilt on all four sides and make a dot. Find the center of all four border strip sets and mark the center with a dot.
Begin pinning at the center dot on the wrong side of the quilt. Pin, pin, pin your way across the top of the quilt, working AWAY from the center. Then place a DOT 1/4" away from the corner.
Begin sewing DIRECTLY on the dot and sew to the other dot. Do not stitch beyond the dot. Start and stop on top of the dot.

Fold the quilt RST. Have the tails of the border extend to the right. The little dot should still be visible. Line a ruler up along the 45 degree line. Draw a line from the DOT to the end of the border.

Peel the border back over the ruler to make sure the triple border is nesting together.

So far so good, stitch directly on the line.

After double checking the results on the front of the quilt, trim 1/4" away from the seam.

Press the seams open on the back.

Voila!! A perfect mitered corner. Now repeat on the remaining three corners and this quilt is almost ready for the finish column.

If anyone ever has any questions, I'm just an email away. sewnwildoaks@gmail.com
Soon,
Lynn
Are you doing any current BOM? Thanks
ReplyDeleteCan you make Butterscotch Baskets bigger? How can I get extra materials? Thank you. Irene
ReplyDelete