Wednesday, November 30, 2011

Just A Hint Of Winterset

Hello Everyone,

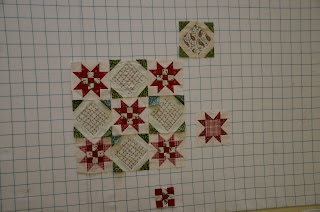
Just a quick peak at the center section. What I draw and what actually makes it to the final design is a dynamic work in progress. I doubt that this center section will be completed by Sunday for the Preview Party. I have to stop changing my mind!


I've been experimenting by cutting petals out of the individual flowers in the fabric.  The left-hand look good, but I lost my way after that. 


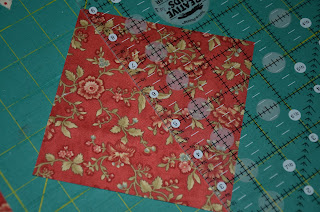
I told you there would be a blue flange around the oval.  Luckily for me, I had this white and blue paisley in my stash that matched the rest of the fabric in the Blueberry Crumb Cake line.  The center oval is a great polka dot from Lakehouse.  I had just a fat quarter of this, so accurate cutting was essential when I cut out the oval.  Then there was the issue of finding a spool of absolute white thread in my cabin sewing supplies for the top stitching.  Do I drive 45 minutes one-way to the nearest quilt shop, or do I use an off-white that may work?  I ended up using what I had and was pleased with the off-white.  No one will notice unless you readers squeal and spill the beans!


I've been making and moving flowers around for a day.  The only component that I know is going to remain is my signature flange.  Decisions, decisions........


As always,

Lynn

Tuesday, November 29, 2011

Winterset from Blueberry Crumb Cake Fabric

Hello Everyone,

I should be decorating and sending out Christmas cards, instead I'm working on my new design called Winterset, made from Blackbird Designs new Blueberry Crumb Cake fabric.  The yardage isn't available at the shop yet, so I'm only working with the blues and whites from a fat quarter tower. 


I was able to squeeze out twelve blocks which was challenging.  I spent most of yesterday designing the center section for this quilt.  I'll be able to show you more tomorrow.  This has taken me out of my comfort zone colorwise.  I do not work within the confines of a limited color palette, but these blues had me from the very first time I set eyes on them.


I never planned to put an applique design in this quilt until yesterday at 4:23am.  Light bulbs started going off in my head, and no, it wasn't the paparazzi!  I jumped out of bed, made my coffee, grabbed a mechanical pencil, gridded paper, and started drawing.

I would like to get this as far along as I can before Sunday, December 4th for the shop's preview party at the Purple Orchid Inn.  What is a preview party you ask?  Well, at In Between Stitches, we have quarterly preview parties displaying the quilts, and projects being offered as classes over the next few months.  It gives everyone a heads-up for upcoming classes so you can mark your calendars, schedule time off work, and make plans for quilting over the next four months.

I will probably be the ONLY instructor holding up three flimsies.  But they are beautiful flimsies and guaranteed to be quilted by the time the classes roll around.

Today I'll be working with (not eating) Blueberry Crumb cake fabric filling the center section with absolute loveliness....well I think so.  If not, then it's back to the drawing board.  And you know there is going to be a blue flange someplace in this quilt!

As always,

Lynn

Saturday, November 26, 2011

Yo-Yo Quilt

Hello Everyone,

I hope all of you had a wonderful Thanksgiving. I know we did! Now it's time to get into full Christmas mode starting today. 

While I was getting ready for the Thanksgiving company last week, I would leave the vacuum cleaner behind and sew a few blocks together for the Yo-Yo quilt.  Before I knew it, another quilt was born!  This pattern is called Welcome Wagon Yo-Yo Quilt and is in a book called Simple Graces by Kim Diehl. 


I've been making the 588 yo-yo's for months....since March 7th to be exact, but who's keeping track of time!  I became an expert making them in the car on the road to the cabin.  The only time I put my needle down was through the windy part of the trip. Wherever I went, my yo-yo making bag traveled with me. 

My granddaughter Emily, also helped me make yo-yo's. Click HERE to see the post from last March when I started this quilt with Emily.  Yesterday when she was here, she searched each and every block to find the yo-yo's she made.

I hope all of you are enjoying your turkey sandwiches.  Our turkey will be transformed into a kettle of soup today.  Enjoy your weekend everyone while decorating your home, shopping or quilting.  This is the "most wonderful time of the year."

As always,

Lynn

Monday, November 21, 2011

Happy Thanksgiving Week

Hello Everyone,

There is so much activity going on here this week with Thanksgiving preparations.  Before I get too busy, I want to wish all of you the happiest of Thanksgivings.  I am thankful for you, my dear readers. 
Your comments and emails brighten my day.  I'm especially thankful for all of the friendships I've made through the blog over the past three, almost four years.  What fun this has been!

Here is a post for a recipe from my family cookbook.  I post it every year at this time BECAUSE THE ROLLS ARE JUST SO GOOD!  I'll be making them Wednesday night so the family can enjoy them on Thanksgiving.  If you have any left, they are perfect for your turkey sandwich on Friday.  Enjoy, and Happy Thanksgiving to all.

As always,

Lynn

Today is another page from the Wilder Family Cookbook. This is probably the most requested recipe in the entire book. I have been known to "hide" a few just so we have one or two to savor the day after I've made them. Now you have to plan ahead with this recipe. Make the dough the night before the event and finish the process in the morning.

This dough is easy to work with and you will love the texture. Watch them carefully in the oven so they stay golden. Here I go with the butter again!


Here's the recipe:


  • Homemade Butter Rolls

    2 (1/4 ounce) envelopes active dry yeast
    1 cup sugar, divided
    2 cups warm water (100° to 110°)
    1 cup butter or margarine, melted
    6 large eggs, lightly beaten
    1 ½ teaspoons salt
    8 ½ to 9 ½ cups all-purpose flour

    - Stir together yeast, 2 tablespoons sugar, and 2 cups warm water in a 4-cup glass measuring cup; let mixture stand 5 minutes.
    - Stir together yeast mixture, remaining sugar, and butter in a large bowl. Stir in eggs and salt. Gradually stir in enough flour to make a soft dough. Cover and chill 8 hours.
    - Divide dough into 4 equal portions. Turn each portion out onto a lightly floured surface; roll into a 12-inch circle.
    - Cut each circle into 12 wedges. Roll up each wedge, starting at wide end; place on greased baking sheets. (Rolls may be frozen at this point.)
    - Cover and let rise in a warm place (85°), free from drafts, 2 hours or until doubled in bulk.
    - Bake at 400° for 10 minutes or until golden. Yield 4 dozen.

Note: If unbaked rolls are frozen, place frozen rolls on ungreased baking sheets. Cover and let rise in a warm place (85°), free from drafts, 2 hours or until doubled in bulk. Bake as directed.
(They aren't quite as good if you do this step.....we prefer them if they haven't been frozen first.)

Source: Southern Living 2001 Annual Recipes – page 21


I have made these without a mixer.....but it's so much easier if you have a mixer with a dough hook to work in the 9 cups of flour.


This is what the dough looks like before you tuck it in the fridge for the night.


This is what you will see in the morning. (I'm glad I don't double in size every night! )


Divide the dough into (4) equal sections. Pat the first section of dough into a small circle then roll into a 12" circle. I always do this on my Hoosier. The dough never sticks and I feel like a part of history when I'm using this old enamel work surface. (I'm not old enough to be considered an historic landmark just yet....but my sister is!)


Cut the circle into (12) wedges and start rolling at the widest part of the wedge.


Lightly grease a baking sheet and put the rolls in a warm spot to rise for about 2 hours.

Voila! Here are your rolls just ready to hop into the oven.


My grandson Austin, holds the record by eating SIX of the rolls at one meal. I now send him home with his own leftover bag.

Have a glorious day everyone.

As always,
Lynn

Thursday, November 17, 2011

Hello Everyone,

Just a quick post this morning to show you the borders on Buttonwood.  I'll most likely quilt a feather and cable design on the tone on tone brown in the border.  I'm still trying to decide what to quilt in the baskets.  An idea will come to me when I least expect it.


For those of you that live locally, Mr. Joe and I will have a booth at Ruby Hill Winery tonight from 6:30pm to 9pm for the annual Sip and Shop.  This event kicks off the Holiday shopping season and should be lots of fun.  While I quilt, Mr. Joe is busy in his woodworking shop making items out of wine barrels.  From benches to dog beds to wine bars, he makes them out of wine barrels.  We call this dog bed a Bark-A-Lounger.  (Can you tell we have way too much time on our hands?)  We call the food bowl holder a Doggie Diner. 


The inside of the barrel was naturally stained by the red wine.  It is a beautiful shade that could never be replicated by any stain purchased at a hardware store.  Mr. Joe's workshop has a wonderful aroma of a winery.  No wonder he escapes to his shop for hours on end.  While I'm stippling....he's tippling.

As always,

Lynn 


Wednesday, November 16, 2011

Country Charmer Class is in Session

Hello Everyone,

Yesterday was another fabulous day in the classroom at In Between Stitches.  Creativity and laughter just bubbled out of the room while the girls worked on their Country Charmer quilts.

I'll start with Barbara's quilt.  She made this block just for me and received extra credit for using checks!

Barbara mainly used Civil War fabrics in her beautiful creation.  She took her homework assignment very seriously and completed all of her blocks and sashings!  This is a picture of her quilt at the beginning of class.

Here is her quilt complete with borders by the end of class.  The ooohing and aaahing was contagious and many shoppers poked their heads into the classroom to see what was going on!

Next is Madonna's wonderful bag of reds and greens.  I just wanted to dive in and caress each and every pieces of fabric.

She finished lots of cutting and then started playing and constructing her blocks.

We all liked the secondary pattern her blocks created without the sashing.  This is going to be very striking with or without sashing!

Then we have Penny from Oregon who joined in with us "virtually".  Penny purchased my pattern and made the quilt throughout the month.  Yesterday morning Penny sent me this picture of her completed blocks.

This morning when I opened my email, what do my wondering eyes see???  A completed Country Charmer all crosshatched, stippled and bound!  Beautiful, just beautiful!

Then we have Lisa.  Those of you that follow my blog will remember Lisa..."Stinkin' cute" Lisa and her blocks.  The motto of the shop is, "A Place Where Friendships Grow."  My friendship with Lisa has grown over the past year and a half.  She has taken every class I've taught, and finished every quilt to perfection adding her personal style to each and every one.  Lisa and her husband are moving to Colorado next month to start a new chapter in their life. I will miss her presence, smile, and laugh so much in my classes.  Look out Colorado, Lisa is coming and will brighten the snowiest of days.  I will miss you my friend.  You will have to join in my classes virtually, just like Penny so I can show your quilts to the world and spread your sunshine.


Lots of sharing took place yesterday.  We found out so much about each other.  As Lisa said in a personal email this morning, we discussed challenges, and the surviving and the sweet victories.....how inspiring is that????? 


I've said it before and I'll say it again......Quilters are the best!  Go about your day and inspire not only yourself but everyone you meet today.  Quilters can change the world.

As always,

Lynn

Tuesday, November 15, 2011

Minglewood Month #5

Hello Everyone,

For those of you working on the Minglewood BOM through In Between Stitches, your bundles of fabric will be shipping out today.   Click here for your fabric cutting directions.  Select Minglewood Month 5 and you will be all set to make four more blocks.

This month you will be making two Path Through The Woods blocks.


I changed the placement of the units for this block.  I just have to be different and put my own spin on everything.

You will be making two Mosaic Variation blocks.  I'm not crazy about these blocks, so I put them on the side of the quilt.  There is an error in the book on page 57 regarding the construction of the Mosaic Variation block.  Instruction #5 should read:  Cut each set of squares into 3" squares as shown above.  (Not 3-1/2" squares.)


Remember this is your final goal and keep working on the blocks and they will be finished in no time at all!  I love this quilt and I can't wait to get it home from the shop. The quilt is earning it's keep right now on display at the shop in all of her glory.


I'm off to the shop this morning to teach the second class session of Country Charmer.  I'll be anxious to see what the girls have created since our last meeting.  If anyone in Blogland is making the quilt along with us, please send pictures to patched55@comcast.net and I'll post them on the blog.

As always,

Lynn

P.S. Mr Joe and I survived the babysitting......bearly....since we saw bear tracks close to the cabin.  For some reason, the boys weren't interested in going outside at night to roast marshmallows around the campfire!

Thursday, November 10, 2011

Missing in Action

Hello Everyone,

I'm here....really I am. Busy week with working at the shop on Monday, and teaching on Tuesday.  I spent my day with 11 very talented, funny and creative quilters Tuesday.  I felt like I was herding cats, trying to keep up with the questions, and oohhing and aahhhing over their beautiful creations.  The primary focus of my drop-in class, is being the head cheerleader and quilting coach to help the girls finish quilts from any of my patterns or from any class that I've taught over the past three years.  From Paula's Party in the Garden


....to Glenda's hundreds of paper pieces for Blossom of Friendship.  This got us going on the paper dolls we played with in our childhood.  We all had lots of practice cutting out small paper pieces from our Lennon Sisters to Debbie Reynolds paper doll collections.


Barbara finished quite a few blocks for Midnight Star quilt by Mary Hickey.


Kathy was working on her Party in the Garden.


Chris finished a couple of gorgeous blocks for her Scrappy Leaves quilt.


Carol made several "hexies" for Summer's Blush.....


....while Janice made a handle for her first basket for Party in the Garden using the basket tutorial.


Kaye was cutting out her pieces and putting them on her block layout sheet for Country Charmer.  The layout sheet has been a big hit to help corral the 53 pieces of fabric.


Then the real challenge began for Mr. Joe and me on Wednesday.....talk about herding cats! We started babysitting our 4-year-old grandson and our 14-year-old step-grandson for five days while Mommy and Daddy are celebrating their anniversary in Las Vegas!!! You know, what happens in Vegas, stays in Vegas.  

Carpooling, football games, pre-school, high school, storytime and Sponge Bob Square Pants just to name a few of the activities since yesterday.   How did we ever raise our own three children and keep some level of sanity?  Last night I was a bit dingy and put the 4-year-olds hair gel on his toothbrush!  Now it looked like toothpaste to me, it was blue just like Aqua Fresh and was in a tube.  Whoever heard of a little kid needing gel anyway?  Let me tell you his teeth are not going to bend in the wind.  God give me strength to make it until Sunday!

Don't plan on any quilting pictures for a few days.  I'm going to be in recovery mode.

As always,

Lynn

Monday, November 7, 2011

Buttonwood

Hello Everyone,

Buttonwood is coming together nicely. My next task is making three more little basket blocks for the corners in the border.  Those little baskets are going to have to wait until Wednesday.  I've also  been auditioning red or brown borders.  Stay tuned to see what my final decision is going to be.  This quilt has checks, stripes, plaids and polka dots all rolled into one. Perfect in my book!


I'm off to work at the shop this morning, then I'll be hosting my drop-in class tomorrow at In Between Stitches.  If anyone living locally would like to attend, the class runs from 10-2pm.  This is a good opportunity to finish up those UFO's or PIGS (Projects in Grocery Sacks) hiding in your sewing rooms.  Or, if you need help working on any of my patterns, or you are finishing up a quilt from any class I've taught, the 2nd Tuesday of the month is a good day to Sew Some Wild Oaks and sew along with me. 

As always,

Lynn

Saturday, November 5, 2011

Basket Tutorial

Hello Everyone,

I've been asked by some of the ladies who signed up for my Party in the Garden BOM through ThimbleCreek for a basket tutorial.  So here you go!  This little basket is going to be in each corner of my new Buttonwood pattern too.  Since I'm a multi-tasker, I'm killing two birds with one stone.  I'll make a basket for the new design, while fulfilling the wishes for a tutorial. 

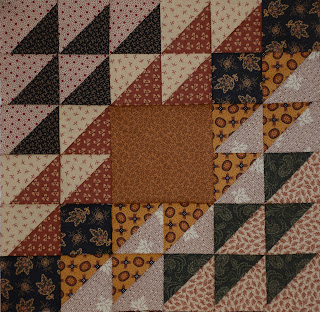
Here's the end result, a 6-1/2" unfinished, cute little basket.

The following series of pictures addresses how to make the basket handle.  Once the handle is made, the rest of the block is a piece of cake.   Just take your time and accurate cutting is absolutely essential.

Start with (2) 3" x 3" blocks cut from background fabric and (2) 3" x 3" blocks from the contrasting fabric.


With right sides together, using a quarter inch ruler, mark each of the blocks like this.  Stitch along the marked lines.

Line a ruler up at the 1-1/2" vertical mark, which should perfectly intersect the center of the block, hold your breath and cut.

 Line up the ruler at 1-1/2" horizontal mark, and cut again.


Now you have eight sections like this.

Cut between the stitching lines.


You will have a total of 16 half-square triangles.  You will only need 12, but save the extra four for another basket.

Press toward the darker fabric.

Trim each of the 12 HST (half-square triangles) to exactly 1".  With a Bloc Loc ruler, you can just slide it from one side to the other for easy trimming.


You will have 12 perfect 1" HST.


Next from background fabric, cut (1) 1-3/8" square and cut it in half diagonally.  This is for the end of the handle.

From the background fabric, cut (1) 3-7/8" x 3-7/8" square for the basket top.  Cut it in half diagonally. Save the extra side if you wish to make another basket.


Place each of the above pieces like this.  Stitch the HST together in groups of two.  Press each section carefully so you don't stretch them out of shape.  Press the seams toward the top of the basket handle.  This is important!  Finish stitching all of the HST together.

It should look like this.  Then sew the triangles to the bottom of the HST strip and press this seam toward the triangle.


Almost done with the handle.


Cut (3) 1" x 1" squares of contrasting fabric for the top of the handle.


Stitch one square to the HST strip.  Press toward the 1" square.


Sew left HST strip to the basket background.  Have your stitching intersect the previous stitches and you will not loose any points in the handle. 

Press toward the large triangle.

Stitch right HST strip to the other side.  Press toward the large triangle.


The hardest part is now over!


Cut (1) 4-7/8" x 4-7/8" square and cut in half diagonally.


A flange is optional here.  Cut (1) 1" x 10" strip of flange material, fold it in half with wrong sides together and press.  Be careful not to stretch the flange.  Stitch it to the basket bottom a scant 1/8"  along the raw edges.

Attach top of the basket to the bottom.  Always trim the little dog ears off.  Press flange down and back seam up.


For basket base, cut (1) 1-7/8" x 1-7/8" square and cut it in half diagonally.


It goes here.

For the remaining pieces, cut (2) 1-1/2" x 5-1/2" rectangles for top and (2) 1-1/2" x 3-1/2" rectangles for sides.  Cut (1) 2-7/8" x 2-7/8" square and cut in half diagonally for bottom base.


Your block should look like this.


From background, cut (2) 1" x 1" square and place at the top of the basket.  Make a four-patch section from the four squares.


Sew basket base triangles to 1-1/2" x 3-1/2" rectangles. Press toward the dark triangle base. Then stitch to basket sides.

Stitch the left long rectangle to the basket. Press toward the rectangle Sew the four patch at the top of the basket to the 1-1/2" x 5-1/2" rectangle. Press toward the rectangle.  Stitch the bottom triangle to the basket base.


You are finished, an almost perfect 6-1/2" basket block is your reward.


No points were lost in the making of this basket!  Well, almost no points.


Have a great weekend everyone.  I have three more little baskets to make for Buttonwood, then I can put it all together!

As always,

Lynn