Showing posts with label Patchwork Math Book. Show all posts

Friday, August 1, 2025

Cozy Country Christmas

 Hello Everyone,

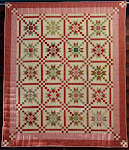
It’s been a full and fulfilling week beneath the oaks and pines at Sew’n Wild Oaks. I put the finishing stitches on my new Cozy Country Christmas quilt—machine quilting complete and ready to shine through the Christmas season.


I love to machine quilt, but I do not love loading the quilt on the machine.  It takes me a fair bit of time to get everything lined up properly before I get to the creative magic.

I'm a slow machine quilter and I spent quite a few hours listening to audible books while working on this one.  Usually, I listen to music while quilting so I can concentrate of the quilting.  This time I listened to books, and I was able to walk and chew gum at the same time.....amazing!


I'll get Cozy Country Christmas trimmed today and prepare the plaid binding on the bias.

I’ve been busy assembling kits for my upcoming retreats, and let me tell you—they’re just too darn cute to take apart! If any extras remain, I’ll post them for sale in my Etsy shop come November.

Next week, I’ll wrap up writing the pattern just in time for my Sew’n Wild Oaks retreat at the end of August. Once it’s ready, I’ll list it in my Etsy shop along with fabric requirements so you can stitch up your own Cozy Country Christmas quilt while the fabric is still available in stores.


I've been volunteering at Independence Hall in preparation for the giant Flea Market kicking off tomorrow—and if you're anywhere near Arnold, you won't want to miss it! It's hands-down the most well-organized Flea Market I've ever seen.

While I plan to steer clear of the shopping frenzy, I’ll be there tomorrow late afternoon helping tidy up and get everything ready for Sunday’s big draw: half-price day. Next week, local organizations are invited to come and take what they need, followed by an open invitation to the community to do the same. I truly admire the organizers for their commitment to excellence—every detail has been thoughtfully planned. Best of all, every dollar raised will go toward a new roof for Independence Hall.

Don't forget my Patchwork Math book is on sale until Sunday in my Etsy shop HERE. 

I have a fun weekend ahead. My sister, cousin, and a friend are arriving in town tomorrow, and on Sunday, there are five of us girls heading to the final show at the Bear Valley Music Festival. The title of the show is Climb Every Mountain, which is fitting since we will be driving up to higher elevations (7,000') to get to the show and listen to show tunes. Mr. Joe is bowing out of this one and will let us girls enjoy the event. After the concert, we’ll gather back at the cabin for a cozy dinner and some good old-fashioned catching up.  Laughter is guaranteed—and there just might be a margarita (or two) in the mix!

Soon,
Lynn


Sunday, July 27, 2025

Patchwork Math

 Hello Everyone,

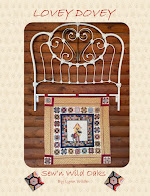
📘 This week, I’m switching things up! Rather than featuring a pattern, I’m spotlighting the BOOK of the week—Patchwork Math—available now at 15% off the regular price in my Etsy shop HERE. It’s the perfect time to add this essential resource to your quilting library and elevate your design skills.


📚 This book unveils the math that powers your favorite quilting elements—from blocks to borders to sashings. With its clear guidance, you’ll discover how to resize each component to suit your creative vision, giving you the freedom to design quilts that are truly your own.


Curious about what makes up a quilt block? Here's a clear look at its key components—and the exciting part is, you don’t need a pattern to bring them to life. With the Patchwork Math book as your guide, you'll master the formulas behind each piece and learn how to design blocks. sashings or borders in any size, straight from your imagination.


I’ve crisscrossed the country teaching Patchwork Math—from North Dakota to Illinois, and all across California. I’ve presented at Quilt Market’s Schoolhouse session in Houston, and my tutorials are also featured on The Quilt Show, making this class accessible wherever your quilting journey begins. The free tutorials are located HERE.

You can download and print the 42-page handout for my class HERE.  Tuck this inside the back of the book and you are ready to start creating!

🧵 Ready to take your quilting to the next level? With just a pencil, calculator, and a bundle of gorgeous fabric, you’re equipped to dive into the world of Patchwork Math—where creativity meets precision and your quilting confidence grows with every block.

Soon,
Lynn


Wednesday, May 10, 2017

The Square in a Square

Hello Everyone,
 
I've been in total, quilting immersion over the past few days and have finally surfaced.  From quilt shows to classes, I have so much to share over the next few days that you too, will be join me surrounded in beautiful quilts, and people.
 
Let's begin with The Quilt Show blog post this morning regarding my Square in a Square segment in the classroom section of TQS.  You can view the video HERE.


I'm going to walk you through the process of making a square in a square using stripes.  I love to incorporate striped fabric in my blocks.  I also have to make sure all of the stripes line up perfectly on the perimeter of the square in a square. 
 
To begin, make sure the corner squares match when cutting. The stripes need to be centered in the square.
 

Cut diagonally.  One is cut to the left, and one is cut to the right.


Place them next to your fussy cut center.


See how they match so nicely!

I use a corner trimmer and trim off the little triangles on each side of the corner squares.  This is important!  WHEN SEWING A TRIANGLE TO A SQUARE, CUT THE CORNERS OFF USING THE 90 DEGREE ANGLE ON THE CORNER TRIMMER.


Do this on the opposite sides of the corner squares.  A 90 degree cut!

 
 Place the triangle on the base square.  It is lined up perfectly on the square.


This is also important.  Stitch with the bias triangle face down on your machine.  Always think, bias on the bottom.


Press the seam in the direction of the triangle and clip off this little doohickey right here.


Now using the 45 degree corner trimmer, cut the corners off at a 45 degree angle.  We do this because we are sewing a triangle to an angle.


Place them on the base square, and they should line up perfectly.  Stitch with bias on the bottom.


Press toward the triangle.  Look, at the perfect stripes and the corner triangles aren't drooping.  This square in a square now measures 2-1/2".  Tiny but very doable.


My Patchwork Math book is available at TQS HERE.  Use the code "EasyMath" and you will receive a 15% discount.  If you ever have any questions, I'm just an email away at  sewnwildoaks@gmail.com
 
I have so many pictures to post over the next few days from the quilt show in Grass Valley to class yesterday.  Quilters fill the world with beauty every time they create.  I am so fortunate to be able to witness hundreds of incredible creations made by amazing quilters. 
 
Soon,
Lynn

Wednesday, May 3, 2017

Y-Squares

Hello Everyone,
 
Today I'm going to talk about the "Y-Square" which is now featured on The Quilt Show in the classroom section.  You can click HERE and view the class to see how I make them and learn the formula so you can make them any size.  This block finishes at 6".  Small, but so cute!


After I make a few Y-squares, I like to divide them into two groups.  The pile on the left is turning one way, and the pile on the right is turning the other way.

 
I play around with my pressing so all of the seams nest together and reduce bulk.


I ended up with five, 2" pinwheels.

 
Here's another great example of the power of the little Y-square.  Jeanne didn't want to make the applique around her Walk In The Park quilt, so she made hundreds of Y-squares instead and created this incredible border.


Here is the lattice border traveling around the entire quilt!  You will be seeing this soon since it is at the machine quilters right now.
 
 
The Y-squares in this block are 7/8" of an inch.  They create the perfect woven top of my basket.


The Y-squares in this block finish at 1-1/2".  The block finishes at 9".  I use that number to determine how many Y-squares I need to make.  9 divided by 6 Y-squares = 1-1/2" each.


It is an extremely versatile quilting component.  I love the look, and I love how easy they are to make.

 
My Patchwork Math book is on sale for 15% off the normal price HERE.  Use the code word "Easy Math" so you get the discount at checkout.
 
This week I'm busily prepared for the Pine Tree Quilters show in Grass Valley this coming weekend.  I'm printing and stuffing patterns, and making more note cards.  Mr. Joe and I have been bonding at the kitchen table while we package the boxes of cards.  As soon as the shows are over, I'll be offering the cards for sale on the blog.  I'm having a hard time keeping them in stock.
 

I've had so much fun with these that I'm thinking about making my own Christmas cards this year.

One more thing to add to my to-do list!


Soon,
Lynn
 

Thursday, April 27, 2017

Baby Blocks

Hello Everyone,
 
In keeping with my half-square triangle theme from yesterday, I made a block using only HST, but this one is 6". I'll be using this block when I teach my Finessing the Figures class.
 
 
I made all of my HST according to the tutorial on The Quilt Show HERE.  To make 8 HST at a time, I began with 4" squares.  You can also see my tutorial at the top of the page located in the Virtual Classroom.  Each HST is trimmed to 1-1/2", so when it is sewn into the block, it finishes at 1".  You are probably saying, "Holy cow! I can't do that!"  Well, I'm here to tell you that you CAN.  Take your time. Cut accurately, trim accurately, use a perfect 1/4" seam, and press in the direction that I'm showing.
 
THE FORMULA:  Remember, always, ALWAYS begin with the finished size!
 
Finished size times 2", then add 2"
 
(1" x 2" = 2")  then add 2" = 4"


First, I sewed the HST together that make the center star.  Yes, I could have made flying geese for the center star, but I wanted this blocks to contain only HST's.


In order to get them to "nest" together, I pressed one HST toward the darker color and one HST toward the lighter color.  The I pressed my seams open.


Front of the section.


Back of the section.  Notice the pressing on the back.  The HST opposite each other diagonally, are pressed in the same direction.  This helps sewing these little guys together.  Then I pressed the seams open to reduce the bulk.


I did the same process for the corners.


You end up with a reasonably lined up block that the quilt police will overlook any minor indiscretions and let slide right in to the quilt.


What's that phrase about looking at a quilt from the distance of 20' from a galloping horse?  Let's hop on our horses (or stick ponies), and start galloping over to your sewing machine today and perfect those little HST's.

Soon,
Lynn


Wednesday, April 26, 2017

Half Square Triangle Tutorial is Featured on TQS today

Hello Everyone,
 
Today, TQS (The Quilt Show) is featuring the way I make half-square triangles.  This entire block is made using only HST.  Now I could have thrown some flying geese in there too, but I want to prove a point on the versatility of the HST.
 

It all begins by making this many 1-1/2" HST for this 9" block.


They can be arranged and rearranged in many different combinations to create very complex designs.


To watch the HST tutorial on TQS click HERE.  The video contains the formula so you will learn to make HST 8 at a time.  This really is a speedy, and accurate method.  The video is only about 7 minutes so you really won't have time to make popcorn during the show.  Make sure you have a paper and pen ready so you can take notes.

A download for the cutting directions to make a 9" block  full of half-square triangle is located HERE. The Patchwork Math book is available HERE at a discounted price.

Remember, my Patchwork Math videos are always available for free on TQS.  So when you are working on something at 2am, and you need a refresher coarse......well there you go.  The tutorials are just a click away.  I also have a tutorial on HST in the Virtual Classroom section at the top of my blog HERE.

I'll be making more of HST today for a project that I'm working on, and I'll post my result tomorrow.

Have fun making your triangles! 

Soon,
Lynn