Hello Everyone,
Here is part two of the Lil' Orphan Scrappy tutorial. I got a little sidetracked when I started making masks.
You can find Part One of this tutorial by clicking HERE It shows you in great detail how to make an Ohio Star block. What I failed to tell you is, you will need to make 76 of these blocks. Slight omission on my part!
This tutorial is going to show you how to attach the setting triangles to the blocks.
I've been busy sewing along with you.
Begin by cutting (152) 5-1/4" x 5-1/4" squares in a variety of colors from light, medium, to dark. You will end up cutting a lot more than the original 152 because you will always find another fabric that you want to add into the mix. Cut the squares in half.
I love selecting the fabrics to put into this quilt. They all look so yummy together. Did I make a dent in my stash?......absolutely NOT. Can you imagine how many quilts we have just waiting to be made out of our scraps? I'm sure it would be in the hundreds just out of my sewing room.
I like to be able to see all of my choices, so I lay them out so I can see what colors I need to add, and what colors I have.
Then I selected four triangles that look good with this block.
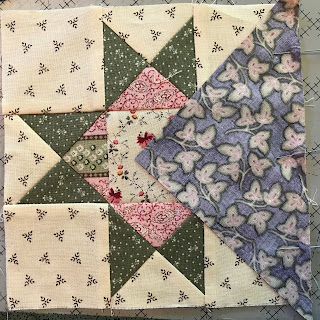
I line up the triangle and pin it to the block.
Flip it over when you stitch. Whenever you stitch something with a bias edge, make the bias piece is touching your feed dogs. You will be less likely to stretch the piece cut on the bias. Let the feed dogs feed it under the needle.
When you stitch on this side of the block, you can see where your stitches need to go, so you don't loose any points. See how the stitching line perfectly intersect across the previous stitching lines. You never want to be pointless!
Press toward the triangle
I've stitched on the opposing triangles.
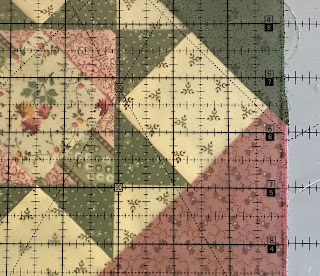
Trim off the dog ears.
Then stitch on the other two sides. Then trim the block to 9" x 9".
Voila!
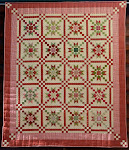
This is what you will need to make using the setting triangles.
When you do this, you get that great rick-rack look for the border.
I will get the last part of the tutorial together this week....promise.
Soon,
Lynn
P.S. If you are interested in purchasing the pattern, it is available HERE in my Etsy shop.


Such a gorgeous quilt! How sweet of you to share your method with everyone. Stay safe and healthy!
ReplyDeleteYou stay safe and healthy too Wendy.
ReplyDeletehow nice! I love the mix of scraps in this - 76 isn't too many is it :)
ReplyDeleteI make my blocks 5 at a time, and they go quickly.
DeleteExcellent tips once again, Lynn. And I love your philosophical quote: "you never want to be pointless" 🤔😄
ReplyDeleteI never want to be pointless.....but sometimes it just happens!
DeleteI am going to go switch the quilt on my bed right now! And on will go my Lil' Orphan Scrappy. That will bring me the pleasure of fond memories.
ReplyDeleteGood for you Fran! Happy Easter to you.
DeleteI love this quilt: ahhh, another quilt that I have the pattern to, but haven't had the time to sew! :-) Happy Easter to you and Mr. Joe! Hugs, H
ReplyDeleteThanks Helen. Maybe you'll have time now...… Stay well,
DeleteLynn
Hello, I can’t seem to find the Part 3 of theirs gorgeous quilt.
ReplyDeletePart 3 is located here: https://sewnwildoaks.blogspot.com/2020/04/lil-orphan-scrappy-tutorial-part-three.html
DeleteThis*
ReplyDelete