

.jpeg)


I have received a couple of requests for a tutorial on the hexagon block which is in my Heartfire pattern. Pictures are worth a thousand words, so here you go.
I always make a pilot block first. I work out any and all pitfalls and issues on my pilot block. Checking for an accurate 1/4" seam is a must.
The pattern includes a paper template for a 4" diameter hexagon. I used an acrylic I Spy template that I purchased from Come Quilt With Me HERE. I've made so many of these quilts, that it made sense to have a permanent template. Center the template over an attractive center, and accurately cut with a rotary cutter.

Cut lots and lots of 1-1/4" strips from a selection of fabrics that you love. In this case, I'm using Midwinter Reds by Moda. Again, if your strips aren't accurately cut, your block is never going to be the correct size.

Place a strip, right sides together on your center section and stitch. Press the seam toward the strip, away from the center.
Next you are going to trim. Line the 60 degree line of your ruler along the bottom edge of the center as shown in the picture. Trim.

Rotate and trim the other side of the strip. Again, line the bottom of the strip with the 60 degree line on your ruler. I have a small. rotating cutting mat that I use and find invaluable when making this block.

Trim.

Sew the second piece to the center as shown in the picture. To be consistent, always have the seam from the first strip facing you. This will help orient yourself to work clockwise around the block.

You know the routine by now. Line the ruler on the 60 degree line and trim.

Now you have two registration marks to line up your ruler for accurate trimming. You have the 1" line on your ruler and the 60 degree line. Proceed in this manner around the block. Stitch, trim, stitch, trim.

At this point, your block must measure 5-1/2" in all directions. I've been known to use spray starch and my iron to make my blocks a perfect 5-1/2". (Sticking your tongue out and looking cross-eyed at the block also helps, just like a little kid working on an art project.....total concentration.)

Now you are ready to start stitching the second "round" of fabrics to the block. This time to keep yourself oriented, always begin with the side of the block that has two seams. Stitch....trim and so on until all of the strips are around the block.


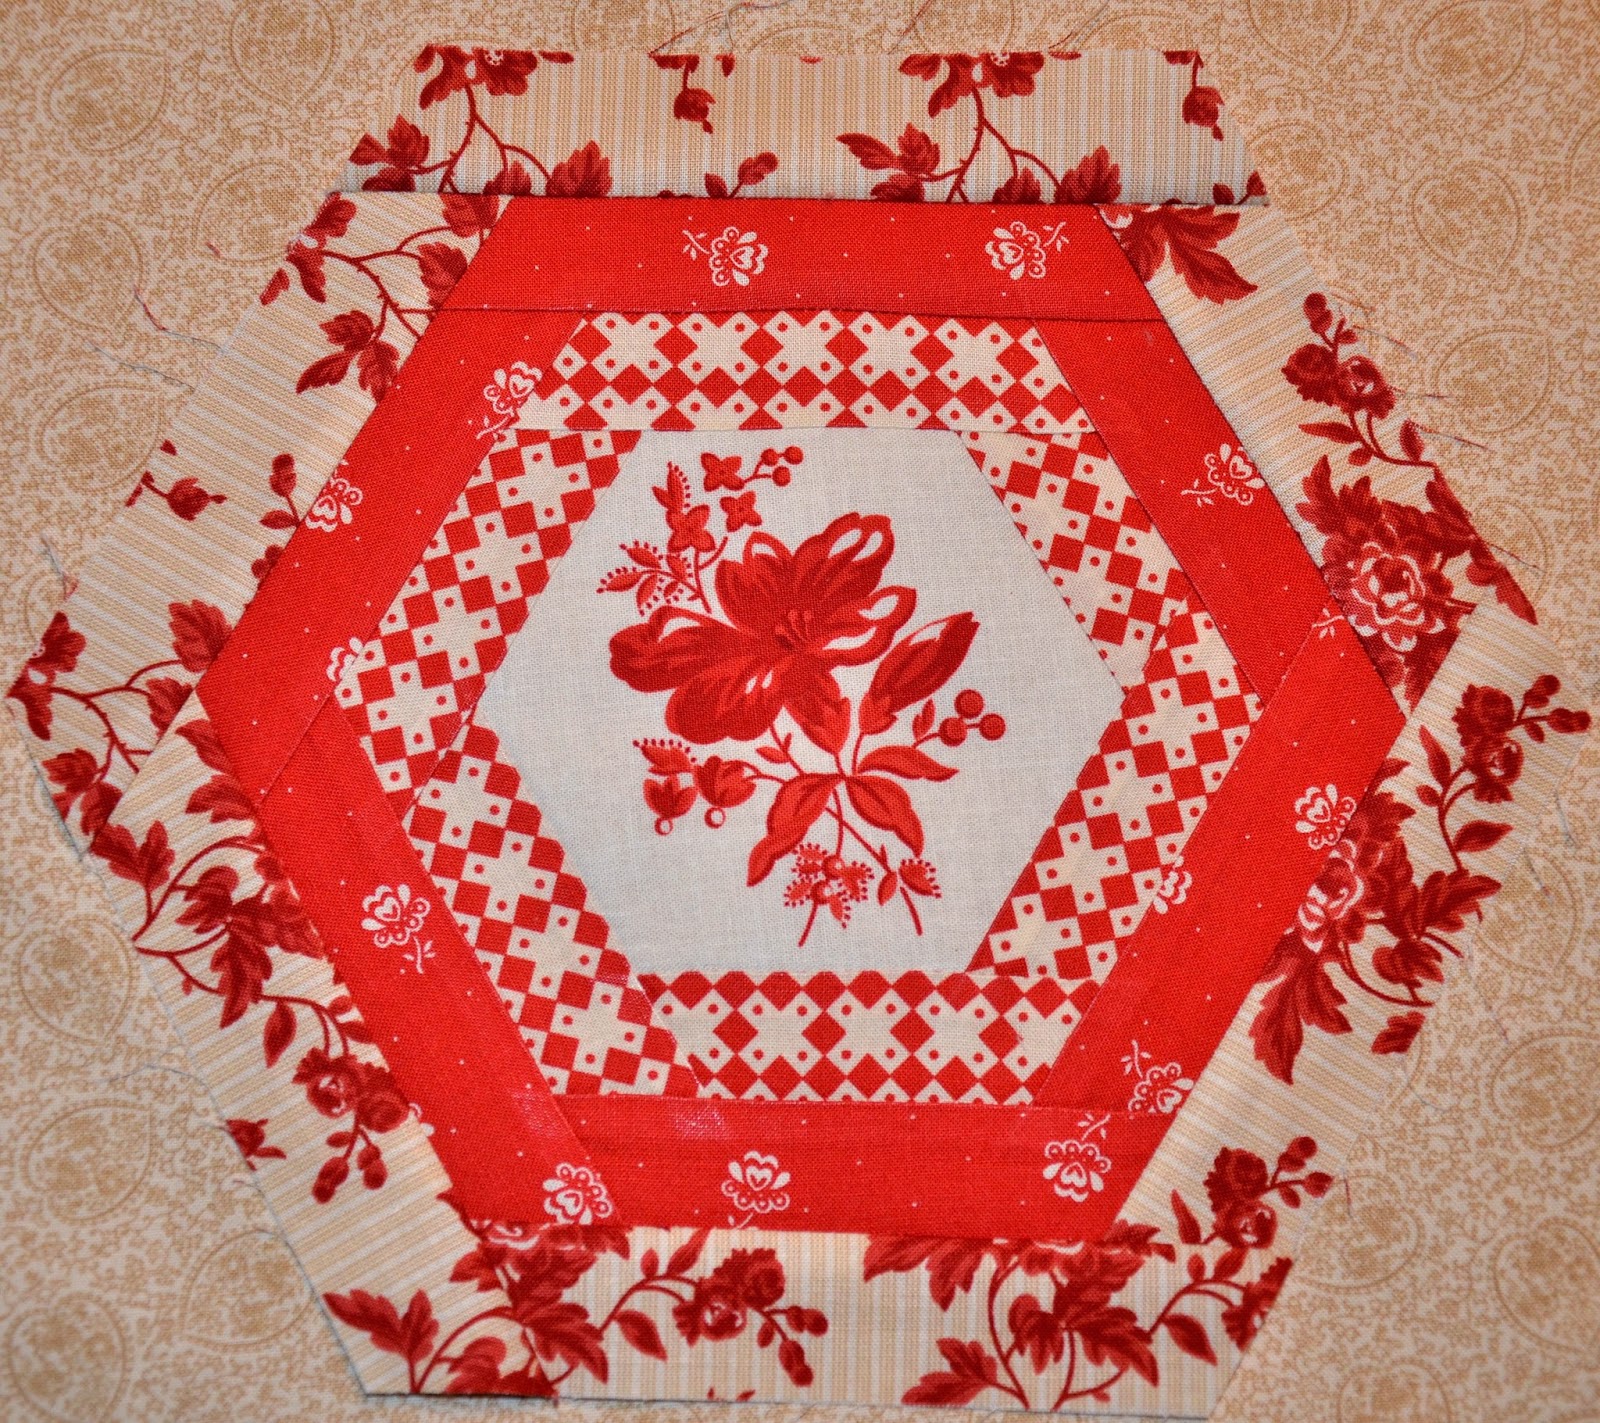
Finally you are finished with round #3 and your block should measure 8-1/2" in all directions.

I work on five blocks at a time which makes the process a bit faster. Remember, always make a pilot block first and constantly check your measurements at the completion of each round.
When I start putting the blocks together, I will make another tutorial about that process. I hope this helps some of you that are making this block and quilt. It is fun, addictive and gives you the opportunity to be creative with many color combinations.
Soon,
Lynn
I am waiting on an order of Midwinter Reds and so want to make these. Thank you for the Tute!!
ReplyDeleteHello Lynn, I am so happy to meet you. I am a beginner at quilting . . . just barely getting my feet wet, but enjoying the process. I really like how you've shown how to use the clear plastic rulers. Of course I purchased one and a cutting mat and cutting wheel . . .why because I knew they where necessary tools . . . but I really don't know how to take advantage of them other than cutting a straight line. I can see that I'm going to learn a lot from you. Thank you.
ReplyDeleteYour newest blogging sister, Connie :)
Wonderful tutorial, Lynn! I'm glad to know someone besides me uses the "alternate" method to measure your blocks correctly!
ReplyDeleteCheers!
It`s super cute.Love your fabrics combo.Thanks for the tuto.Hope to try it!!
ReplyDeleteWhoever would have thought your tongue could be so useful when quilting? I know I find it is invaluable when I'm aiming for consistently perfect seams.
ReplyDeleteGreat tutorial and am anxious to see more. Jane
ReplyDeleteOh my gosh this is an excellent tutorial, thank you. However, I am confused about the size of any hexagon. You describe a third way to measure, flat side to flat side. The others I have seen were across the widest part and along one of the six sides.
ReplyDelete