Hello Everyone,
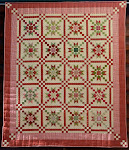
Here is month #6 for Country Corners, my free BOM using my Patchwork Math book.
I've made two variations of the same block. The first block is my favorite. I like the black star which is more striking than the red star. You can really see how fabric placement really makes a difference in the overall look and definition of the block.
Square
in a square in a square – Make (4) Directions on Page #12
Fussy Cut (4) Squares
2-3/8” x 2-3/8” for centersCut (8) Squares 2-1/4” x 2-1/4” for first set of corners
Cut (6) 2-5/8” x 2-5/8” medium
Lay your components out like this, and then make the rectangles with the little square attached.
Trim to 4” x 4”
------------------------
Center square
Fussy cut (1) 2-1/2” x 2-1/2” square
Long rectangles creating the star pattern is not in the book. Follow the directions below
Cut (4) Rectangles 4” x 2-1/2” light fabric
Cut (8) squares 1-1/2” x 1-1/2” medium or dark fabric
Mark a line from corner to corner on each of the 8 squares like so:
Place on the rectangle, right sides together, and stitch right on the line. Trim off excess ¼” from the seam, and press toward the corner. Repeat the procedure on the right-hand corner.

I'm off to teach at the shop this morning. I'm going to have a classroom full of my delightful Sew'n Wild Oaks girls. I look forward to seeing them every month. I wonder what they've finished now!!
Soon,
Lynn


.JPG)


.JPG)
.JPG)

Thank you for the pattern. I just need to get busy now!
ReplyDelete