Showing posts with label Tutorial. Show all posts

Tuesday, July 9, 2024

Lil' Orphan Scrappy Free Tutorials

 Hello Everyone,

Through the intense heat wave in California, I've have sequestered myself away in my sewing room.  While working on some special projects, I've been creating a lot of scraps.  I have the perfect pattern to use up those scraps as the largest piece you need measure 5-1/4". That pattern is called Lil' Orphan Scrappy and I have FREE tutorials for you posted below. I made this Lil' Orphan from all of my Marcus Fabrics scraps.


This was a fun one to quilt.  I knew I wanted to have feathers running across the quilt.


I love being able to put those scraps to good use to make quilt instead of storing them away in a closet never to be seen again.


In the past couple of weeks, I had the pleasure of seeing two Lil' Orphan Scrappy's.  The first one was made by my friend Mary Sue.


Mary Sue plays the French Horn which made the perfect center for one of her blocks.


My sister also finished up all of her blocks and she's getting ready to sew the rows together.  She would have had it completed if I didn't have her working on a project for me!


I looked through my blog and found some more Lil' Orphans made by my friends.  Here's Jeanne's quilt.


Here is Paula's quilt which she showed us at one of my retreats.


I put some tutorials together so you can create your own Lil' Orphan Scrappy.  The tutorials are totally FREE, and you do not need to purchase the pattern if you follow the tutorials.  

PART ONE is located HERE.
PART TWO is located HERE
PART THREE is located HERE.

Every Lil' Orphan Scrappy quilt is unique to the creator and is a reflection of your quilting style and stash.  Make a few blocks a week, and before you know it, a quilt is born.


We are still in the grip of a massive heatwave here in California which is extremely tiring day after day.  Not to mention the fear of fire as the forest around us is tinder dry.  We don't have AC, but we do have fans and open up the house every morning to let the cool air in, then we close it all up around 10am to keep the intense heat out.

Enjoy the tutorials and stay cool!

Soon,

Lynn


Friday, February 18, 2022

New Tutorial for A Ribbon Runs Through It

 Hello Everyone,

I posted another tutorial covering the construction of the corner blocks for A Ribbon Runs Through It.  Those of you who have kits may want to work ahead, and make a few of these blocks for a change of pace.

After I make each component, I place it on the block layout sheet in the correct orientation.  This sheet helps to eliminate errors.

Prior to cutting, I spray my fabric with Faultless Heavy Duty Spray Starch.  It makes all the difference in the world.  After I thoroughly soak the fabric with starch, I let it dry on this old drying rack above my bathtub. This old antique comes in very handy!


As you can see, I hang quilts up in the bathrooms too!

Soon,
Lynn


Sunday, April 19, 2020

Lil' Orphan Scrappy Tutorial Part Three

 Hello Everyone,

This tutorial is the 3rd and last one in the series for Lil' Orphan Scrappy.  The tutorial will cover the final border and how to put the quilt together.


Begin by cutting (26) 5-1/4" x 5-1/4" light squares and (26) 5-1/4" x 5-1/4" dark squares.


Place the squares right sides together.

©      I use a small Omnigrid™ ruler that has a centerline ¼” from both sides of the ruler.  Place the ruler diagonally on the wrong side of the light fabric and draw a faint line on each side of the ruler using a marking pencil or quilting chalk.  Make sure it is a very thin line.


Stitch directly on the lines. Cut them apart between the stitching lines.  Open, and then press seams toward the dark fabric for half of the HST.  Press the other half toward the light. You will have (2) half-square triangles. I used a Bloc-Loc ruler and trimmed the HST to 4-3/4" x 4-3/4".


       Sew the HST together in groups of two and mix the colors together. Since you pressed half of the HST's to the dark, and half to the right, use one from each pile.  The seams will nest together. After you stitch two together, press seams to one side. 
        
       Make 26 sets.


Make (4) light HST for each of the corners in the border.  Cut (4) light squares 5-1/4" x 5-1/4"   Place them right sides together.  Draw lines just as you did in the prior step.  Cut the HST apart.  Trim to 
4-3/4" x 4-3/4".


Now you are ready to layout your HST and blocks.  If you have a design wall, use it.  Blocks look so different when you lay them out on the floor.  I suggest you take a picture of the layout, and if you have the capability, turn it into gray scale.  You will be able to see the contrast much better in gray scale.


Alternate the direction that you press the seams. Press one row to the right, and the next row to the left so the blocks will butt up against each other.

      
      The quilt should measure 77” x 86”.  There are a lot of seams in this quilt.  If you are remotely close to the final size, be happy!

Here is an up close image of my machine quilting.  I purposefully planned the layout with staggered blocks, so I could have a quilted line of feathers between the rows.  I also quilted a tight stipple in the light areas of the blocks.


Here's the quilt on my long arm taken from the side of the quilt.  It is so hard to get a good picture to highlight the machine quilting.  In the zig-zag area, I used a golden thread color.


If any of you ever have a question, I'm just an email away.  Here's my email address:
sewnwildoaks@gmail.com

I hope you enjoyed the tutorials.  I would love to have you send me pictures of your blocks, and of course pictures of your finished Lil' Orphan Scrappy quilt!

Stay safe and healthy.

Soon,
Lynn

P.S. If you want to purchase the pattern, it is located HERE in my Etsy shop.

Saturday, April 11, 2020

Lil' Orphan Scrappy Tutorial Part Two

Hello Everyone,

Here is part two of the Lil' Orphan Scrappy tutorial.  I got a little sidetracked when I started making masks.


You can find Part One of this tutorial by clicking HERE  It shows you in great detail how to make an Ohio Star block.  What I failed to tell you is, you will need to make 76 of these blocks.  Slight omission on my part!


This tutorial is going to show you how to attach the setting triangles to the blocks.


I've been busy sewing along with you.


Begin by cutting (152) 5-1/4" x 5-1/4" squares in a variety of colors from light, medium, to dark. You will end up cutting a lot more than the original 152 because you will always find another fabric that you want to add into the mix.  Cut the squares in half.


I love selecting the fabrics to put into this quilt.   They all look so yummy together.  Did I make a dent in my stash?......absolutely NOT.  Can you imagine how many quilts we have just waiting to be made out of our scraps?  I'm sure it would be in the hundreds just out of my sewing room.

I like to be able to see all of my choices, so I lay them out so I can see what colors I need to add, and what colors I have.


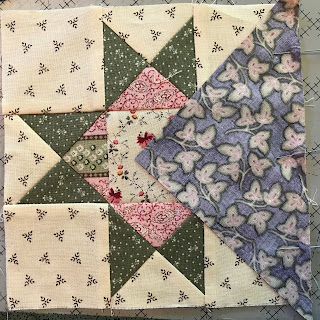
Then I selected four triangles that look good with this block.


I line up the triangle and pin it to the block.


Flip it over when you stitch.  Whenever you stitch something with a bias edge, make the bias piece is touching your feed dogs.  You will be less likely to stretch the piece cut on the bias. Let the feed dogs feed it under the needle.


When you stitch on this side of the block, you can see where your stitches need to go, so you don't loose any points. See how the stitching line perfectly intersect across the previous stitching lines.  You never want to be pointless!

Press toward the triangle


I've stitched on the opposing triangles.


Trim off the dog ears.

Then stitch on the other two sides.  Then trim the block to 9" x 9".


Voila!

This is what you will need to make using the setting triangles.


When you do this, you get that great rick-rack look for the border.


I will get the last part of the tutorial together this week....promise.  

Soon,
Lynn

P.S. If you are interested in purchasing the pattern, it is available HERE in my Etsy shop.


Monday, March 16, 2020

Dresden Tutorial - Spoken For Pattern

Hello Everyone,
 
While we are spending more time at home, quite possibly in our sewing rooms, let's learn a new technique to add to our quilting toolbox......the Dresden Plate block.  My blocks are a little different because I'm combining Fans and Blades.  The Blades are the "pointy" bits, and the fans are rounded.


This is the block I'm making using Far Horizons fabric by David Schulz for Henry Glass Fabrics.  Begin by selecting three fabrics that look gorgeous together.  With this fabric line, they all look gorgeous together!


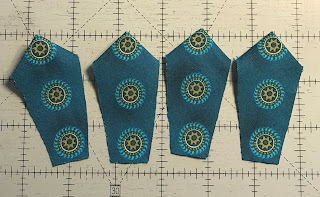
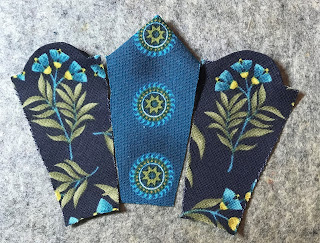
According to my pattern called Spoken For, I made templates out of template plastic.  I LOVE the gridded template plastic.  I like to make my templates out of plastic so I can see the underlying design for fussy cutting. In this picture, you can see that I outlined four blades on the wrong side of the fabric. 


I fold them in half, right sides together and pin. 


Then stitch 1/4" from the wide, top of the blade.


Clip the inside corner off along the folded side.


Press the seam open.

Use a little pointy thingy and turn the blade inside out.  Press.


And then there were four.


Now we make eight fans.  Use your template made out of plastic, and fussy cut the fans.


With this template, make a freezer paper template.  This is where my method differs from the norm.  Mr. Joe always tells me I'm not normal!


Iron the freezer paper template to the wrong side of the fan.


Clip the fabric right to the paper template.


I used a Clover, fabric folding pen filled with Best Press, and applied a little bit of starch to the exposed fabric.  You could also use a small brush to apply the starch.


I used an iron, and pressed the fabric over the template.


Remove the template and it looks like this.  Do this procedure on all the fans.


The fans are going to be placed right next to the prepared blade.

 Pin the pieces together.

Start stitching at the skinny end.  Before I start stitching, I move my needle one notch to the left. I stitch about halfway, and move the needle back one notch.  This procedure helps gather the center area together.  You can see that my stiletto is pointing to where I moved my needle back to its normal position.


Another little tipsy is to apply a thin, line of Best Press directly on the thread.  This also helps in the final construction and makes the seams flat.


You can't tell my needle was moved over a notch the first half of the stitching. This will ease the center area down.


I think these fabrics look great together.


Now I do the same procedure with the fans.


I lay all of the parts and pieces together, and continue stitching the seams together.


I fold my background fabric into quarters, and lightly press.  This helps me line up the Dresden Plate onto my background.  Then make the center hexagon out of the same fabric used for the blade.  At this point, I hand applique the plate to the background.  You could also machine applique the block to the background fabric.

I find the application of the Best Press directly to the thread line, and moving the needle over a notch, make the block flat.  In the past when I made this block, the center area looked like a square dancers ruffly skirt! Do you know what I mean?  I used to starch the block into submission with heavy duty spray starch.  Now I don't need to do that.

 
I have a lot more blocks made now, but I don't have a picture to show.  I only have to make one more block.  I may be far enough along to get a good picture later on.
  

Stay safe and hunker down.  We are self isolating at the cabin.  We are already quite isolated, so this is nothing new for us. We couldn't get more isolated if we tried!

Soon,
Lynn