


.jpg)


Hello Everyone,

I'm going to try to do a post every other Thursday to help you with your Country Charmer quilt. I'll also start a new section at the top of the blog just for the Country Charmer QAL so those of you that are making the quilt can go directly there for reference and inspiration.
First of all, I'm so excited to see how many of you expressed an interest in making this quilt with Lesely The Cuddle Quilter, QuiltSue and me. The Country Charmer pattern has been flying off the shelf at In Between Stitches and mailed out around the globe.
This first tutorial will cover how I approach the quilt and the block itself and will concentrate on Section A, the area here with the red circle. When in doubt read, READ the directions, look at the graphics. More often than not, the answer to your question is right in front of you. I'm always just an email away if you need help. Send all emails to patched55@comcast.net and I'll get back to you just as soon as I can.

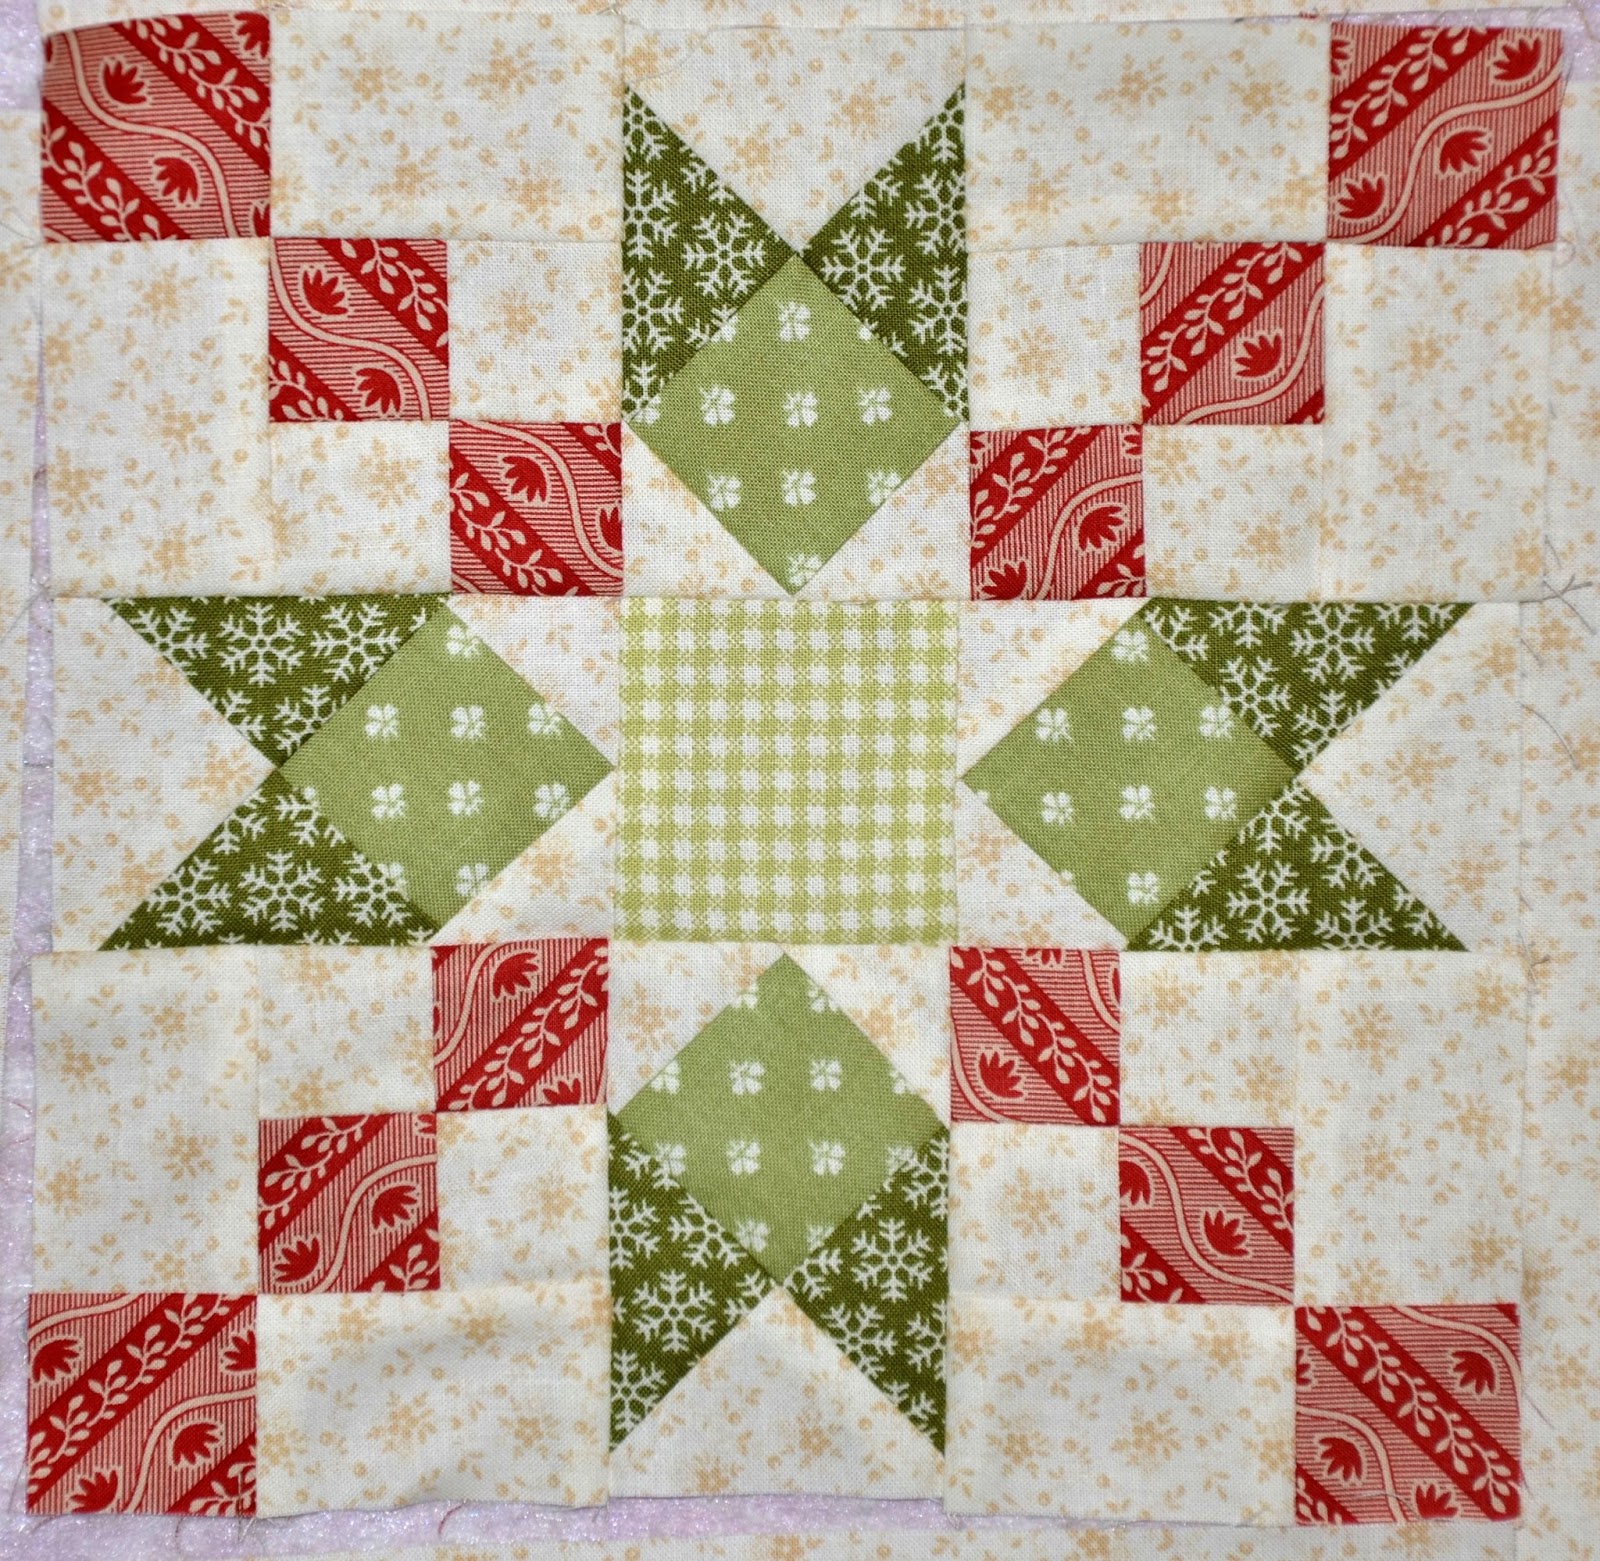
First, I'll start by selecting my fabrics. You know me, this is going to be a very scrappy quilt. Each of my blocks will be different. I'll incorporate every color from the spectrum into a pleasing combination of eye candy. After rummaging, I mean browsing through my fabric bins, I decided my first block is going to be along these lines. I start with an interesting center and key on those colors throughout the rest of the block.

There are many keys to becoming an excellent piecer. The first key is the cutting! Cut carefully and accurately. The shapes on your Country Charmer Layout chart are the exact size of the piece. If your pieces don't fit within the designated shape, then back to the cutting board you go. Put all of the pieces on your layout sheet. Are you pleased with the look? Is there anything you want to change? If you do change your mind, start little baggies to hold the pieces that may work just perfectly in another block. Label each bag with the appropriate letter, F, G, etc.

I start stitching in a clockwise direction around the sheet. Start with pieces A & E.

Chain piece them together. Always press in the direction of the arrows on page 2 of your pattern. Place the sewn piece back onto the block layout sheet.

Next, sew B to H.

A LITTLE TIPSY - When sewing a triangle to a square, trim the corners first at a 90 degree angle. I LOVE using the Perfect Patchwork Corner Trimmer by Marti Michell. The trimmer has both a 90 and a 45 degree cutting angle.

Piece B should look like this before you begin sewing.

See how it fits perfectly to piece H.

Chain piece them together. Press in the direction of the arrows. TURN THIS UNIT OVER AND STITCH WITH THE TRIANGLE AGAINST YOUR FEED DOGS. REMEMBER, BIAS ON THE BOTTOM.

Put the pieces back on your sheet. Again, work clockwise around your sheet and you will be able to keep your wits about you. (At my age I need all the help I can get!)

Stitch the green triangle E to H. You know how to do this.

A LITTLE TIPSY - When stitching a triangle to a section with an angle, trim the corners at a 45 degree angle with a corner trimmer.

Like this.

Then chain piece them together.

Stitch the whole unit together, locking the seams together, and you will have (4) perfect 2-1/2" x 3-1/2" sections. Take a big sigh of relief, the hardest part is done! The rest of the block is a piece of cake.


Trust me, you will get to the point where you will be working your way around the block in no time at all. I will do a tutorial on SECTION B soon.
Here are two more examples of my fabric selections and the resulting block.


Note in the first two versions of this quilt, I used background fabric in the little triangles around the center square. In my new version, I'm filling them with color......and I'm loving the addition of one more color to the block. I'm enjoying the complexity and depth that one more color adds. I also used the same background fabric throughout the whole quilt.....but not in my new version.
You have to think a little more about what looks good together with the addition of one more color. YOU CAN DO IT! I know you can.

My goal for this quilt along is to help us all become better quilters. You are virtually attending one of my classes for free! Ladies pay big bucks to come to my classes.....but not you my faithful readers! You can attend this class in your PJ's.....I won't tell!
Soon,
Lynn
P.S. If anyone else wants to join in, the pattern is available HERE at In Between Stitches. This is a slow-paced QAL. Finish what you can. Send me pictures and I'll post them. Send me questions and I'll answer them. I'll be posting more details along the way, so stay tuned.


