


Hello Everyone,
This post is Part 1 of a tutorial for my Heartfire pattern. You will learn how to make this cute block. Since I wrote the pattern eons ago, I found a better way to make the block, and this process is quicker.

The fabric that I'm using is called "Snow Birds" by Barb Tourtillotte for Henry Glass Fabrics.
I cut my center hexagon with a 4" acrylic template. You don't have to have a template, but it will make your life easier. The 4" is measured from flat side to flat side. Not point to point.

I cut a whole bunch of strips that are 1-1/4" by the width of fabric. This way I can see them and have them available right at my finger tips.

I select three strips for each block.

Next, place the hexagon on top of the strip, right sides together. You don't need to make just one at a time. You could make several blocks with the same strip, and just chain piece.

ALWAYS press toward the strip.

You will add the next strips like this.


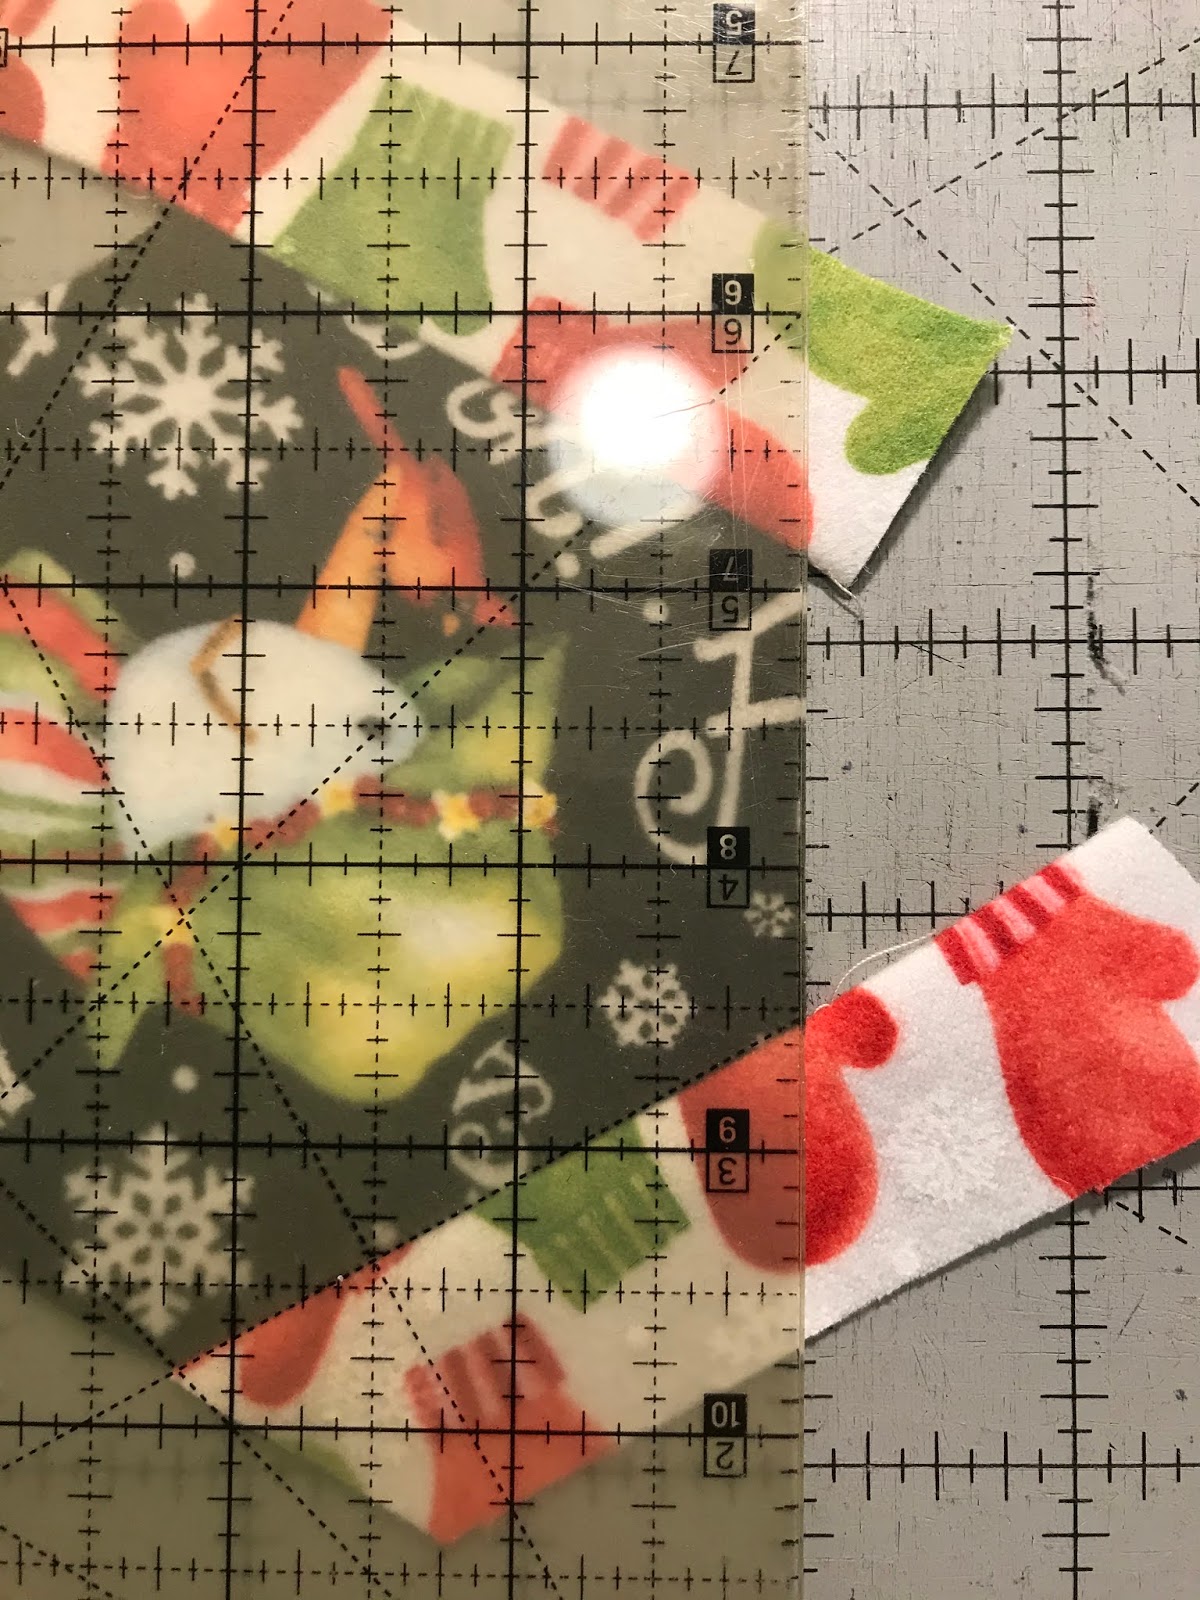
Now comes the important trimming part. Most rulers have a 60 degree line on them. Line your ruler up on the seam line, and trim off the tails.


Rotate the hexagon, and trim the other side. Line your ruler up along the 60 degree line, and the seam line, then trim. Just lift your ruler up, and rotate the section underneath the ruler.

Rotate and trim again.


Then you will end up with this little cutie.

Now you are ready to finish off the center section by adding the rest of the strips.


Now when it comes to trimming, you have two reference points. You have the 1" line on your ruler, and the 60 degree line. It is important that both of them are in alignment to insure a perfect block.


Now you are ready for round #2. Follow along with this placement. You can see that I'm starting round two where the two seams from the prior strips come together.

Align your ruler with the 1" mark and 60 degree line on your ruler. Trim, rotate and trim all of the strips.

Then you have this.

Add the other three strips.

Now this will measure 7" from flat side to flat side, not point to point.

Now it's time for the final round. You know the routine by now.


The block will measure 8-1/2" from flat side to flat side.

This is a great pattern to showcase a cute little "something" in the center of the block. It is also great for an I Spy quilt. I usually have at least five blocks going at the same time. It really goes much quicker that way. Occasionally there is a happy accident or two!
I'll work on Part 2 of the tutorial this week. I just need to carve out some time in my busy day.
Soon,
Lynn
I only got a little bit dizzy...round and round!! Thanks Lynn!!!
ReplyDeleteTry making 5 at a time.....then you'll really get dizzy!
DeleteMy plan was to finish my Heartfire at the Retreat, not! Hopefully this will get me going. My blocks are all finished, just need to get them together. Also, I have two hexagon table topper packs waiting to be made. Thanks for the wonderful patterns to keep me busy!
ReplyDeleteGood for you Fran! I'll look forward to seeing your blocks at the retreat next year.
DeleteI've been enjoying my Heartfire blocks. I actually had the French General centers that you used in my stash and for my rounds I'm going scrappy. I enjoy the Rainbow Scrap Challenge hosted by Angela @ SoScrappy so I've got lots of colorful hexies. Hope to finish it up this year! Thank you, Lynn!
ReplyDeleteFrench General fabric lines almost always have a perfect center for this pattern.
ReplyDeleteThank you for the tutorial, Lynn. It's a great refresher!! The hexies you're making with this fabric line are really cute :D
ReplyDelete