Wednesday, December 8, 2010

Christmas Windows Quilt

Hello Everyone,

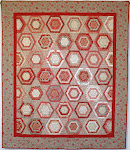
This quilt is called Christmas Windows by Brandywine Designs. This is my favorite Christmas quilt that I made several years ago.  The other evening at my drop-in class, Mary showed us her "almost finished" quilt blocks. I'm sure we left some drool marks on them!  Here is my finished quilt.  This was the second quilt that I quilted on my quilting machine and I was a nervous wreck on this one.


I posted some close-up shots of some of Mary's blocks and some of mine.  I think Mary and I are kindred spirits.  We just met a couple of months ago, yet look at how similar our blocks are!  I made mine years before I ever met Mary.

Example #1 - Lynn's
Example #1 - Mary's
Example #2 - Lynn's
Example #2 - Mary's
Example #3 - Lynn's  (Now this is where it starts to get a little scary.  Look how we each fussy cut our flowers using paisley!)

Example #3 - Mary's  (I'm loving Mary's Buffalo check)

Example #4 - Lynn's

Example #4 - Mary's

Example #5 - Lynn's

Example #5 - Mary's

Example #6 - Lynn's


Example #6 - Mary's (I have Buffalo check envy at this point!)

Mary, you are a woman after my own heart.  I love your precision, and the way you fussy cut exactly the same way I do!  You have great attention to detail and it shows!  You bring your "spark" to class every month.  Thank you so much for entertaining all of us!

Unless you are super-quilter-extraordinaire, do not attempt to make this quilt by Christmas 2010.  But if you start now................

As always,

Lynn

Monday, December 6, 2010

Pastel Heartfire

Hello Everyone,

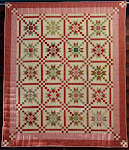
On this blustery day in California, I think we all need a breath of spring, so I'll post the quilt top I finished yesterday using my Heartfire pattern.  This truly is a scrappy quilt.  I used fabrics from nine different lines of Fig Tree Quilts.  That is the beauty of fabric collections from the same designer.  They can be mixed and matched so easily and look good without a great deal of effort.


I've been collecting and collecting this fabric and it was past time to start using it up.  Which I didn't, but I made a good dent in my Fig Tree stash.

All of the 4" centers were cut from the larger floral patterns then surrounded by smaller prints, checks, stripes and don't forget those dots!  I love the polka dots and use them whenever I can.


This will make a nice twin size quilt for one of my granddaughters.


Tuesday, December 7th, is Preview Night at In Between Stitches.  The quilting and sewing instructors will be showing the quilts, garments or projects that we will be teaching from January thru April of next year.  It's a great way to see everything and start planning your quilting class calendars.  I had to get this quilt top finished before Tuesday.  There is absolutely no way it will be quilted in time......but it will be quilted by the time I teach the class!  I will also be teaching Madrigal, Summer's Blush and I'll have my Party in the Garden drop in class. 

Have a wonderful week working on your "gotta get it done lists".  What is the worst thing that can happen if you don't get it done?  Try not to stress too much.  Remember, this is the most wonderful time of the year and we need to slow down and enjoy the season.

As always,
Lynn

Saturday, December 4, 2010

Flower Tutorial

Hello Everyone,

I received several emails and comments requesting a tutorial for the little flowers the ladies made in the Party in the Garden class. Isn't it sweet!


For a flower the size of a half-dollar, start with a half-dollar


With a marking pen or pencil, trace around the half-dollar on the wrong side of your fabric.


Trace around the half-dollar five time and very carefully cut the circles out along the marked line.  These are your petals.

Fold in half and press.

Fold in half again and press.


Make a running stitch along the bottom of the raw edge.  DO NOT CUT OR KNOT YOUR THREAD YET.

Continue on with a running stitch with petal numbers 2 thru 5.

The petals are now all joined together and look like little dunce caps!

Gently, but firmly, pull the thread and gather the petals around in a circle.


This is where you need an extra set of hands.  I used an applique board and pinned the last petal to the board while making a knot or two.  Then sew the end of petal #1 to petal #5 with a couple of stitches.  (Sorry, I forgot to take a picture.)

Now for the center.  Use a dime-sized plastic template or a dime.  Trace around with a marking pen, a generous 1/4" and cut along the marked line.  (By the way, this is how I make all of my circles for berries or flowers for all of my applique projects.)

Make a running stitch.

Pull your thread.

Iron the section, then remove your template or dime.  Don't worry about removing the template.  Since the section was pressed, the fabric will have a memory and know where it is supposed to stay.  If the section seems to be a little "loose", just tighten up the thread.


Now tie your knot and iron it again.....with steam, lots of steam.


At this point, I glued the center section to the flower petals, making sure no raw edges were visible.


The flower is ready to be used as an embellishment.  Attach the flower by sewing around the center section with a blind applique stitch.  To make it even more secure, use a button in the center.  You have endless possibilities.

Coin size, determines flower size.  If you are so inclined, make little, itty bitty flowers by using a quarter.  Let me know if any of you make a dime-sized flower.....this,  I gotta see!  I was quite pleased with the half-dollar flower. 


So there you go....total cuteness!  These little flowers that will add charm to any project.

Have a wonderful weekend everyone while working on your Christmas To-Do Lists.  Remember to carve out some time for yourself this weekend......and enjoy the process. 

As always,

Lynn 

P.S. For those of you that live locally, Joe and I will be in our booth at Ruby Hills Winery for Holiday in the Vineyards.   This is a fun event and our biggest show of the year.  I hope to see some of you there.