Thursday, January 30, 2020

Moda Block Heads Block #3

Hello Everyone,
 
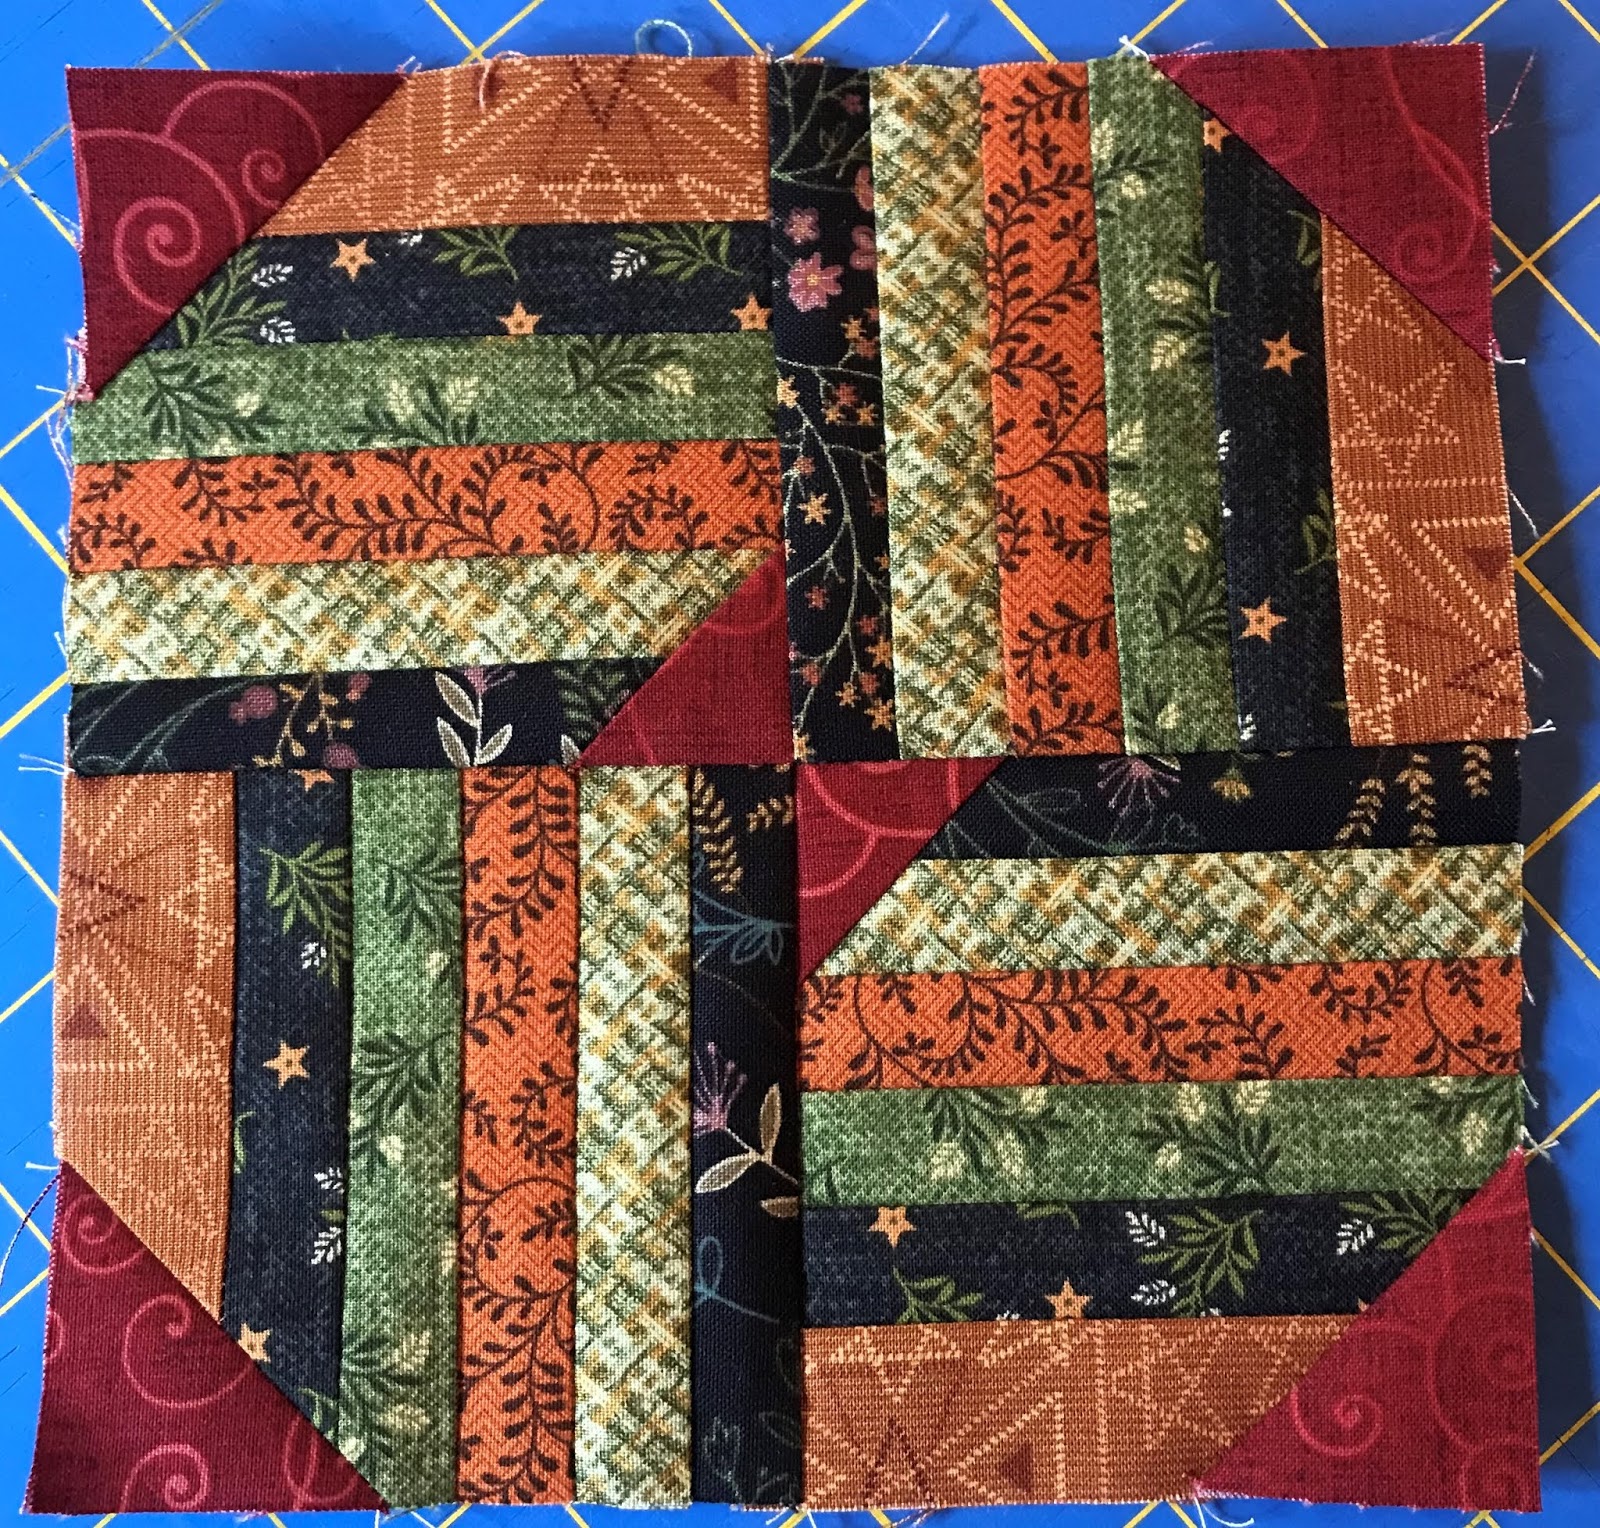
I'm trying to keep up with the Moda Block Heads.  Yesterday I put everything aside, and made Block #3.  This block is from Betsy Chutchian, and I am only using Betsy Chutchian's fabrics in my blocks for this program.  This fabric is called Sarah's Story and is available in shops now.


Quite often I'm asked how I manage to work with tiny components.  You can learn how I make my Flying Geese, four at a time, by visiting The Quilt Show.com and watching my video for free HERE.
One key tool in my production, is using a Bloc-Loc ruler for absolutely perfect Flying Geese.  The ruler locks into the geese, and then you trim.


Also, after I stitch the square to the finished Flying Geese, I run a line of Best Press right along the thread line with my Clover, fabric folding pen.  I fill the plastic tube with starch, and apply it sparingly.

You can see the threads are just dampened.  Then I press this unit on my wool pressing mat.  Using a wool mat is like pressing on both sides of the component.  The heat radiates back up through the unit.


I also make my itty-bitty 1" HST eight at a time using this method.  The video is available on The Quilt Show.com by clicking HERE.  Two, 4" squares yield eight, 1" HST.  If you watch the video, you will also learn the formula.


Once I get the HST done, I trim them to the correct size with a different Bloc-Loc ruler.  I forgot to take a picture.....sorry.

 
There are several different ways I could have arranged the components.  This is what Betsy suggested.


Here is an alternate layout.  All I did was change the orientation of the HST's.  I also like this layout.  If I get time....NOT.....I will make another block using different fabrics in this layout.


Today I will be grumbling at our glorious state of California Sales Tax website.  I have to pay the sales tax I collected for the last quarter of 2019.  It always puts me in a bad mood.  They say they've made improvements to the site.  I'm not totally convinced that's true.  My son-in-law tried to pay his sales tax online last night for his business, and I could feel the frustration in his voice when he called for advice. The state doesn't make it easy to give them money! 

There have been two different mountain lion sightings in our area this week.  This really makes us nervous when we are out walking Mazey.  A little air horn doesn't seem like much defense against a predator the size of a lion .  The air horn works with bears, I'm not so sure about a mountain lion.  My friend said you have to make yourself look big, and pull your shirt up over your head.  Well, if I did that, the mountain lion would die from laughter if they saw my boobs. Note to self -- Wear bra when out walking...or not! 

Soon,
Lynn


Wednesday, January 29, 2020

Moda Block Heads 3 - Block #2

Hello Everyone,
 
I'm trying to keep up with the Moda Block Heads 3 program.  I finished Block #2 the day before #3 is set to be released.
 

Block #2 was from Sherri McConnell.  We only needed to make one block.  I chose to make four, 4" blocks and sew them together.  I was playing around with placement, and decided to go with the yellow in the center instead of the blue.  Each 4" block is identical, I just rotated them before sewing them together.  When making blocks this small, I press most of my seams open.  I also choose to make flying geese instead of making the entire block out of half-square triangles.  That way I had fewer seams to contend with, and match up when I stitched them together.


Now I have two, 8" blocks finished.  I haven't a clue on how I'm going to do my final layout.  I'll have to wait and see what all of the blocks look like in the end.


I'm only using fabrics by Betsy Chutchian from Moda.  I love her style and all of her lines work so well together.  I'm determined to keep up, even though I know it's going to be hard with my schedule.  I encourage you to join in the program to help grow your quilting skills.

Soon,
Lynn

Sunday, January 26, 2020

Buttons and Bows is a Wrap

Hello Everyone,
 
Buttons and Bows is quilted, bound and ready for cuddling on the couch.

 
The fabrics that I used are a combination of Best of Days, and Country Journey from Henry Glass Fabrics.  I have a tutorial for this quilt HERE on my blog a few posts ago.


 A lot of ditching and feathers on this one.

 
This quilt is going to be perfect to cuddle with on the couch while watching Sanditon.  Mr. Joe knows that I am swooning over Mr. Sidney Parker played by Theo James.  Oh my talk about brooding, goods looks.  Sanditon was adapted by Andrew Davies from an unfinished manuscript by Jane Austen.  The series is on Masterpiece on PBS.  Well worth your time. It's on tonight...YIPPEE!

I'm headed to Livermore today to see "my girls", and teach at In Between Stitches on Monday and Tuesday.  The added bonus is watching my grandsons play flag football this afternoon.  The boys are playing on the same team again this year.  It is so fun to cheer for my boys, who always have some great plays and exciting moves.

Enjoy your week everyone. 

Soon,
Lynn


Thursday, January 23, 2020

Machine Quilting Progress

Hello Everyone,
 
Yesterday I started machine quilting Peek-a-Boo Pumpkins.  I really do love this ribbon border!
 

I braved the elements, put on my hand warmers, and headed up to the garage to my long arm. It was a chilly 45 degrees in the garage when I started quilting, and a balmy 51 when I stopped quilting.


Once the pumpkins are done, I'll start quilting Buttons and Bows.  This one could take a bit longer, so I'll have to keep coming down to the cabin to thaw out.


My commitment to Henry Glass & Co. as a Brand Ambassador, is that I will make three small projects or one large project during the month of January.  I haven't started project #3 yet.  I do know what I'm going to do, and it's going to be small!  Very, very small. 
 
Soon,
Lynn

Wednesday, January 22, 2020

Peek-a-Boo Pumpkins

Hello Everyone,
 
I focused on my Peek-a-Boo Pumpkins yesterday and got it all together.  The only thing missing are the eyes and the whiskers on the mice.  So I guess if I leave them off, I could call this 3 Blind Mice!
 

I used a buttonhole stitch when I machine appliqued.  I hand-stitched the little mice.


Each of the mice are close enough to their houses in case they need to dash inside.


The littlest mouse is already tucked safely inside her house.


Here are a few close ups on how I get my vine to curve.  First of all, I use bias bars to make my vine.  I used the narrowest one I have.  If you look closely, you can see that I made a running stitch along the inside of the vine.  In other words, if I want the vine to curl to the left, I stitch on the left side.  If I want it to curl right, I stitch on the right side.


My running stitch was along about 8" of the vine.


Then I pull the thread, and the vine curls right up.  You have to kind of work with the gathers to get them evenly distributed.


The tutorial for the ribbon border is located HERE in my Patchwork Math segment on The Quilt Show.com

The size of the table runner is 20" x 42".  You can bet your bottom dollar I will NOT be putting the turkey platter on it next Thanksgiving!  Or the mashed potatoes, or any kind of food that may leak, or drip.

It is getting out of the 30's today, so maybe I can get this little cutie on my long-arm and start quilting.  Yesterday I checked on the temperature in the garage where my long-arm lives, and it was 42 degrees.  Maybe I can stand it for half-hour stretches before I have to come down and warm up in the cabin.

I have been receiving a lot of requests for this pattern.  As soon as I can come up for air, and finish my projects for Henry Glass Fabrics this month, I'll get this pattern together.  The fabric used in this table runner is called Best of Day by One Sister Designs.

I enjoy responding to all of the comments directly in the comment section.  I like the fact that sometimes you are responding to each other.  Great interaction!  It is easier for me to reply directly to everyone using this format.  It is much more inclusive.

Soon,
Madam Ambassador


Monday, January 20, 2020

Changing the Front Porch

Hello Everyone,
 
Yesterday I changed out the quilt on the front porch and put out my Heartfire quilt.
 
 
French General fabrics from Moda, always offer something that I can use for an attractive center hexagon.


I've made this quilt multiple times in different colorways.  My sister Gail worked on this version with me and it hung in the Marcus Fabrics booth at Quilt Market.


I also made one in Fig Tree fabrics.  The pattern looks completely different every time I make it.


Yesterday we were glued to the TV watching football playoff games.  I've enjoyed watching both teams this season, and would have been happy to see either one go to the Super Bowl.  But, my heart was with my California team.

Our neighbors came over and we had an indoor tailgate pot luck party.  Here's one of the things I made and I'm sharing the recipe with you.  This Coffee Orange Fudge Cake is my go-to cake that I can't screw up at high altitude backing.  It is so moist, and so rich, and so popular with guests. 

 
Coffee Orange Fudge Cake
1 pkg. devil’s food cake mix
1 (8 oz) carton sour cream
½ cup salad oil
½ cup water
4 eggs
1 (3 oz.) pkg. instant chocolate fudge pudding mix
¼ cup coffee liqueur
2 tablespoons finely-shredded orange peel
1 teaspoon ground cinnamon
12oz. semi-sweet chocolate chips
Powdered sugar (optional)
 
©      Grease and flour a 10-inch fluted tube pan.  In a large mixer bowl, combine cake mix, sour cream, oil, water, eggs, pudding mix, liqueur, orange peel and cinnamon.
©      Beat with an electric mixer on low speed until blended, scraping sides of bowl constantly.  Beat on medium speed for 4 minutes. 
©      Stir in chocolate pieces.  Pour into prepared pan. 
©      Bake in a 350° oven for 60 minutes or until a toothpick inserted near the center comes out clean.  Cool on a wire rack 10 minutes.  Remove from pan and cool on rack.  Sprinkle with powdered sugar, if desired. 
©      Makes 12 to 16 servings.  This recipe is a blue-ribbon cake from Better Homes & Gardens Test Kitchen.  This cake freezes well.  It’s rich and moist.
 
We also made Shrimp on the Barbie which always gets a laugh.  The funniest part was Mr. Joe trying to find a Barbie doll here in our small town.  He found this one at Dollar General, and the cost was considerably more than a dollar.  There were three little girls in line behind him at the check out stand, and all of them wanted the doll.  It's pretty hard to explain that Barbie was going to be part of the table decorations covered in leafy lettuce and shrimp!  I don't know who was more traumatized.  I'd better put this Barbie in a safe place because he is NEVER going to go buy another Barbie by himself!
 
Soon,
Lynn

Saturday, January 18, 2020

Buttons and Bows

Hello Everyone,
 
It's been a busy week here at Wilder's Last Resort.  I loved being inside at my machine while the snow fell like crazy.  I worked on this project for Henry Glass & Co.  I'm going to call it Buttons and Bows.  There aren't any buttons on it yet, just pretend for now...ok?
 

With the borders, the quilt measure 46" x 46".  There are (36) 6" x 6" blocks in the quilt.


There is where the "bows" comes into the name of the quilt.  There are little flashes of red in each of the corners.  I finished it off with a flange, border, and a little "scrolly" accent in a corner.


I began the project by combining two lines of Henry Glass fabrics, Country Journey by Jan Mott, and Best of Days by Janet Rae Nesbitt. 


I put a little tutorial together so you can see how I made the blocks.  I began by cutting a lot of 1" strips and put them on my Strip'n Sew that Mr. Joe made for me.  A pasta dryer works well too.


Then select 6 different fabrics.

Stitch them together.


Always press toward the last strip sewn on.


Cut the strip set into (12) 3-1/2" x 3-1/2" squares.


You will have a ton of these!  Each strip set makes three identical blocks.


Lay them out like this.


Place a 1-1/2" x 1-1/2" square on the two center corners.  Note that I mark each square corner to corner.  Stitch directly on the marked line.


Trim off the extra.

Now you will have this.  Press toward the red square.


Now stitch the sections together.


Now put 1-1/2" x 1-1/2" on each of the other corners. 


Stitch and trim.


Press the corners in the opposite directions.  When you do this, the blocks will "lock" when you put all of the blocks together in the quilt.


Voila!  (36) 6-1/2" x 6-1/2" unfinished blocks.


It has been very cold here.....too cold to venture out to the detached garage and machine quilt.  Yesterday I checked on the temperature in the garage.....31 degrees is not an optimal machine quilting temperature.  I could use my space heater, but it's like heating a barn.  I may be able to get the temperature up a few degrees, but by then, I would still turn into a popsicle.

Don't forget to check out the comment section on my blog.  I've been keeping up with the comments, and I've responded to each and every one.  It's been fun, and it's creating an ongoing dialog about each post.  I like being able to touch base with everyone, even those with a no-reply status.

Have a great 3-day weekend!  It's always a 3-day weekend here in the mountains.  If I didn't have my to-do calendar next to my computer, I would never know what day it is!

Soon,
Madam Ambassador
for Henry Glass Fabrics