

.JPG)


COUNTRY CHARMER QUILT ALONG POST #1
Hello Everyone,

I'm going to try to do a post every other Thursday to help you with your Country Charmer quilt. I'll also start a new section at the top of the blog just for the Country Charmer QAL so those of you that are making the quilt can go directly there for reference and inspiration.
First of all, I'm so excited to see how many of you expressed an interest in making this quilt with Lesely The Cuddle Quilter, QuiltSue and me. The Country Charmer pattern has been flying off the shelf at In Between Stitches and mailed out around the globe.
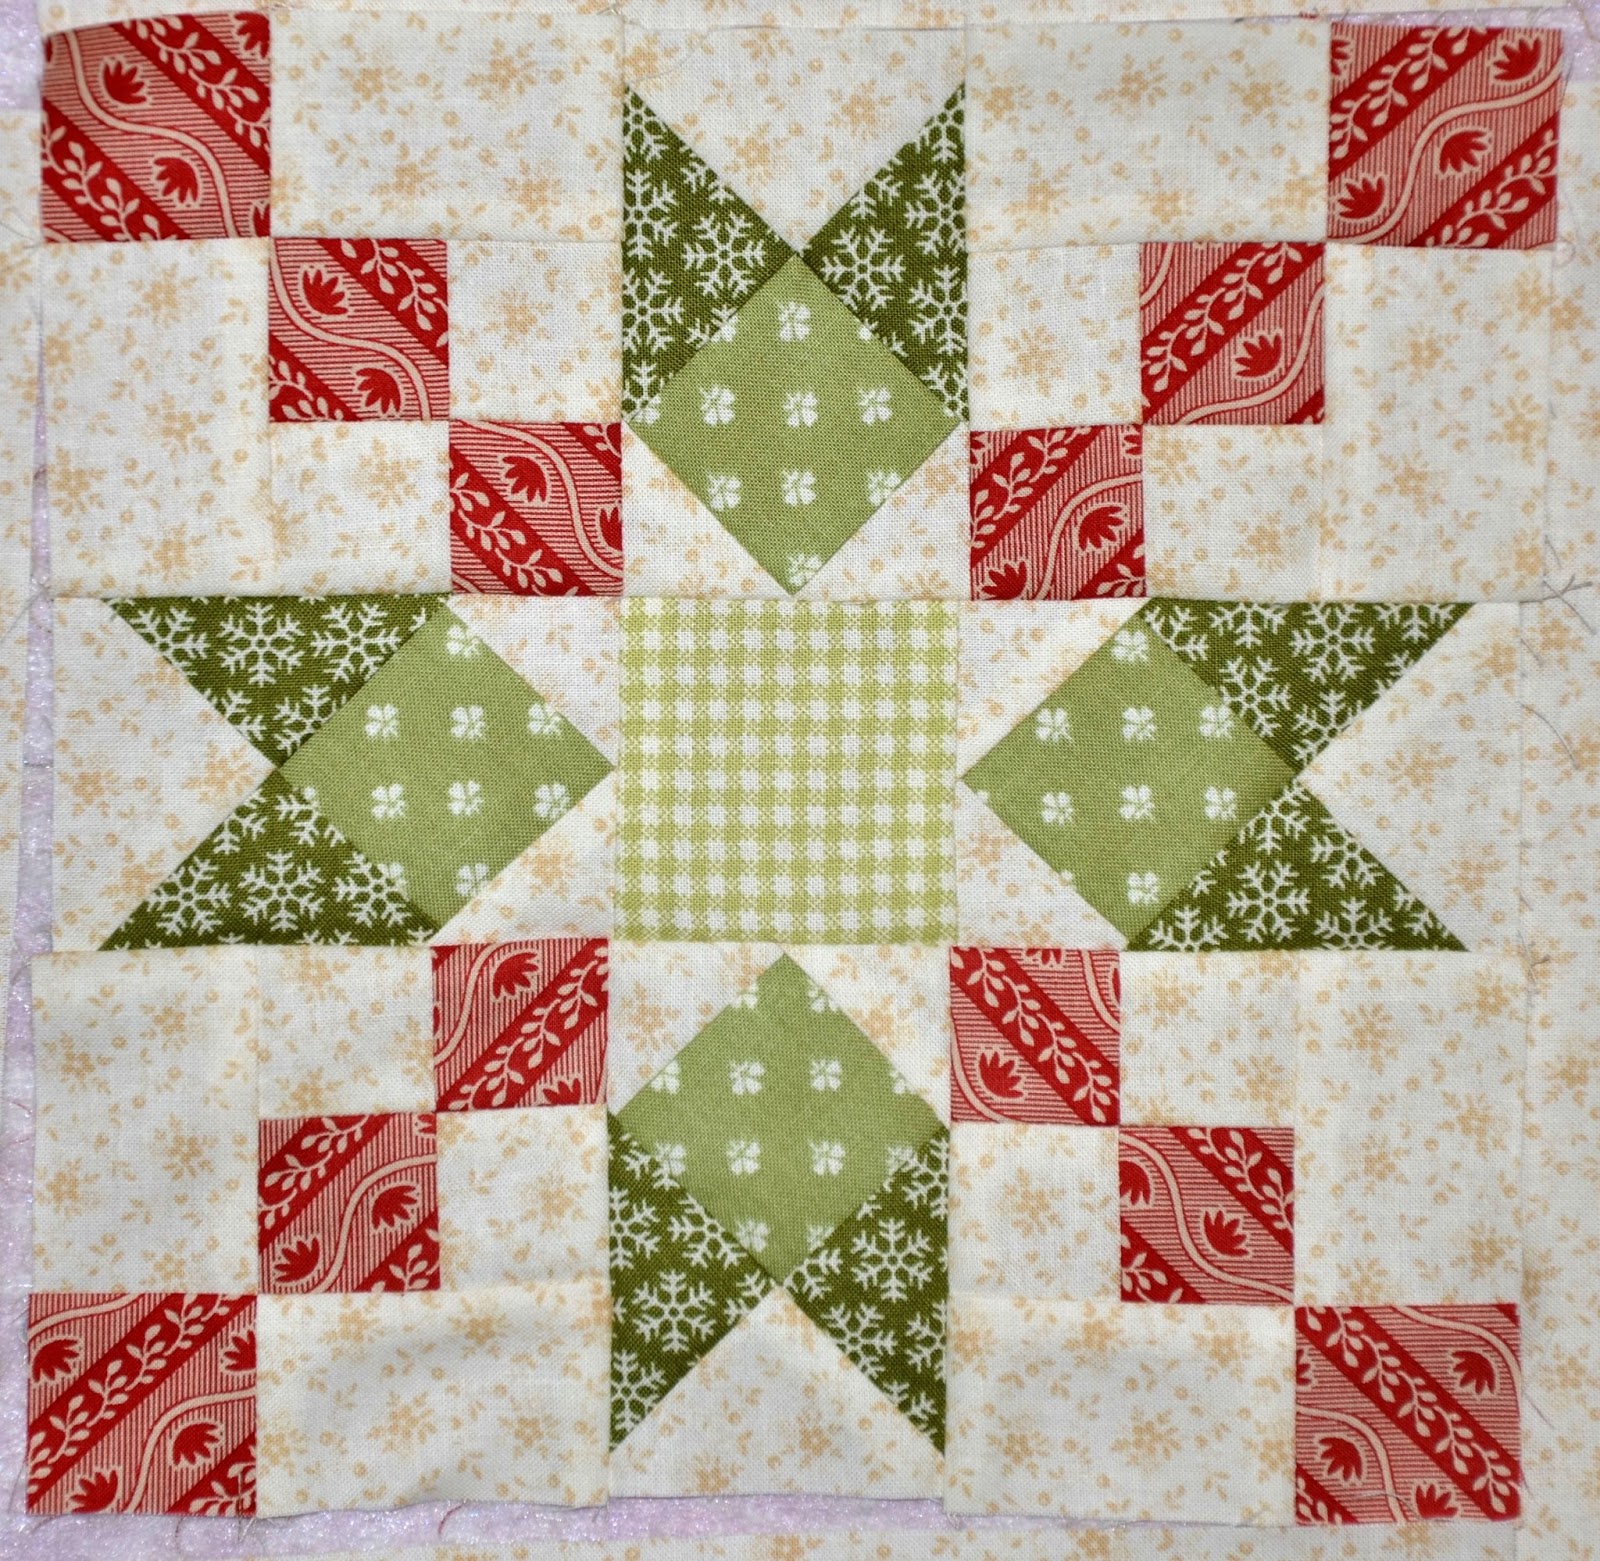
This first tutorial will cover how I approach the quilt and the block itself and will concentrate on Section A, the area here with the red circle. When in doubt read, READ the directions, look at the graphics. More often than not, the answer to your question is right in front of you. I'm always just an email away if you need help. Send all emails to patched55@comcast.net and I'll get back to you just as soon as I can.

First, I'll start by selecting my fabrics. You know me, this is going to be a very scrappy quilt. Each of my blocks will be different. I'll incorporate every color from the spectrum into a pleasing combination of eye candy. After rummaging, I mean browsing through my fabric bins, I decided my first block is going to be along these lines. I start with an interesting center and key on those colors throughout the rest of the block.

There are many keys to becoming an excellent piecer. The first key is the cutting! Cut carefully and accurately. The shapes on your Country Charmer Layout chart are the exact size of the piece. If your pieces don't fit within the designated shape, then back to the cutting board you go. Put all of the pieces on your layout sheet. Are you pleased with the look? Is there anything you want to change? If you do change your mind, start little baggies to hold the pieces that may work just perfectly in another block. Label each bag with the appropriate letter, F, G, etc.

I start stitching in a clockwise direction around the sheet. Start with pieces A & E.

Chain piece them together. Always press in the direction of the arrows on page 2 of your pattern. Place the sewn piece back onto the block layout sheet.

Next, sew B to H.

A LITTLE TIPSY - When sewing a triangle to a square, trim the corners first at a 90 degree angle. I LOVE using the Perfect Patchwork Corner Trimmer by Marti Michell. The trimmer has both a 90 and a 45 degree cutting angle.

Piece B should look like this before you begin sewing.

See how it fits perfectly to piece H.

Chain piece them together. Press in the direction of the arrows.

Put the pieces back on your sheet. Again, work clockwise around your sheet and you will be able to keep your wits about you. (At my age I need all the help I can get!)

Stitch the green triangle E to H. You know how to do this.

A LITTLE TIPSY - When stitching a triangle to a section with an angle, trim the corners at a 45 degree angle with a corner trimmer.

Like this.

Then chain piece them together.

Stitch the whole unit together, locking the seams together, and you will have (4) perfect 2-1/2" x 3-1/2" sections. Take a big sigh of relief, the hardest part is done! The rest of the block is a piece of cake.


Trust me, you will get to the point where you will be working your way around the block in no time at all. I will do a tutorial on SECTION B soon.
Here are two more examples of my fabric selections and the resulting block.


Note in the first two versions of this quilt, I used background fabric in the little triangles around the center square. In my new version, I'm filling them with color......and I'm loving the addition of one more color to the block. I'm enjoying the complexity and depth that one more color adds. I also used the same background fabric throughout the whole quilt.....but not in my new version.
You have to think a little more about what looks good together with the addition of one more color. YOU CAN DO IT! I know you can.

My goal for this quilt along is to help us all become better quilters. You are virtually attending one of my classes for free! Ladies pay big bucks to come to my classes.....but not you my faithful readers! You can attend this class in your PJ's.....I won't tell!
Soon,
Lynn
P.S. If anyone else wants to join in, the pattern is available HERE at In Between Stitches. This is a slow-paced QAL. Finish what you can. Send me pictures and I'll post them. Send me questions and I'll answer them. I'll be posting more details along the way, so stay tuned.
COUNTRY CHARMER QUILT ALONG POST #2
Hello Everyone,
I've been reading blogs and emails about what colors and fabrics to select for Country Charmer. I'm feeling your quandary. Don't be afraid of using a lot of different colors. Embrace the beauty that it brings to the blocks. Start by selecting an interesting center and pull those colors out into the rest of the block.


Each of my blocks sings their own song. Collectively they make a beautiful chorus. Don't forget they will be separated by a fairly wide sashing (even though I do like the secondary pattern they create.)

Here's an example of my decision making process when planning out fabrics for my block. I started with this combination. Whenever I remove any of the pieces, I save them in little baggies so I can use them in another block.

Then I changed the background fabric to something a little plainer. I like this background better for this block.

Then I changed out the 12 dark little squares from green to a dark red.

These 12 little squares weren't working for me either. To plain.

Now this is more like it. Polka dots, checks, pleasing background

This selection works for me. It is a combination of Civil War meets Thimbleberries meets checks. It works.

A finished block that makes me happy.

Work with your colors on the block layout sheet. This is the place to just play. Another bonus of the block layout sheet is that grandchildren think it's a great puzzle. My little 5-year-old grandson had a ball placing the pieces on the chart for me. It's a fabulous introduction to geometry.
I hope this helps when it comes to fabric selection. You will know it when you "nailed" the block. Not all of them will be a masterpiece, but they can make beautiful music together.
Soon,
Lynn
P.S. An extra big thank you to Quilt Sue for designing the County Charmer Quilt Along button for me. I absolutely love it! Another extra big thank you to Lesley the Cuddle Quilter for setting up the Flickr Country Charmer page HERE. I couldn't have done this without your help. You girls rock!
COUNTRY CHARMER QUILT ALONG POST #3
Hello Everyone,
.....and then there were nine......nine blocks filled with wonderful color.....well on my way to a Country Charmer quilt. I try to have each and every block different than the rest, all with an interesting and unique story to tell. I want my blocks to be reading a different page in the same book. And, I want that book to be a real page turner.
Whenever I want to be able to see my fabrics and strips together, I always put them on my pasta dryer. Everything is right at my fingertips and doesn't take up much room. I load this up with the colors that I want to incorporate again and again for continuity throughout the quilt. I'm incorporating four different fabrics for the backgrounds.

Always start with an interesting center.
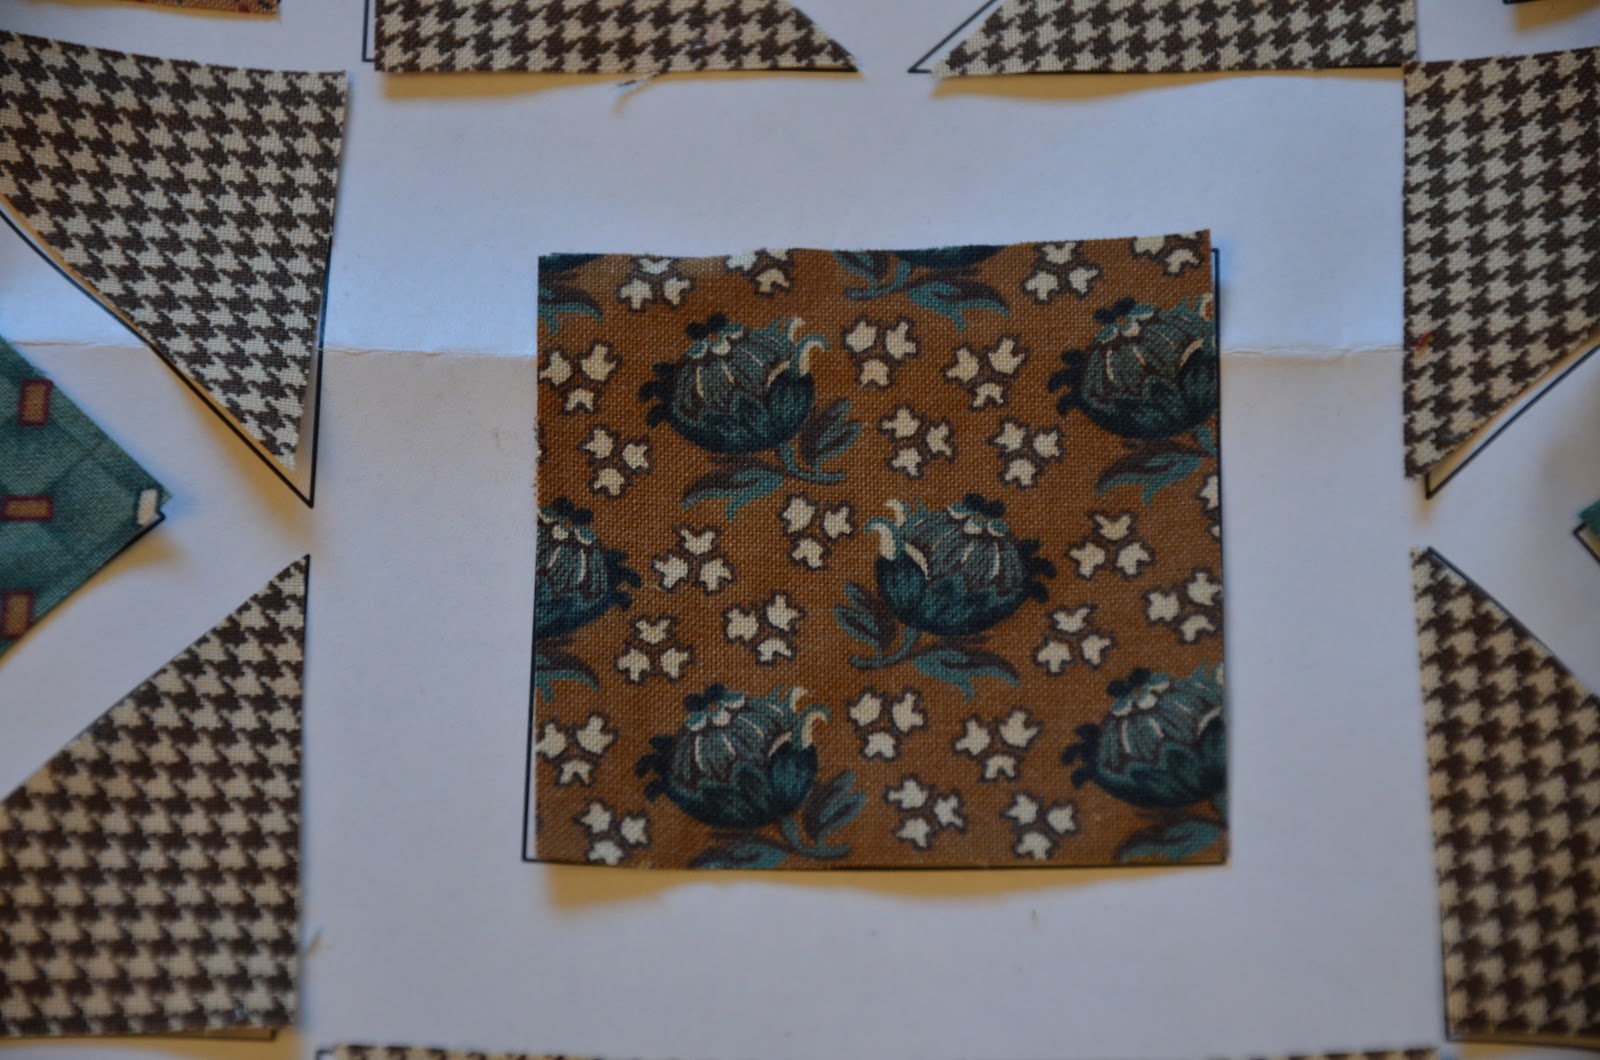
P-U-L-L the center colors all the way through the entire block.

Line your fabrics up to see who is touching who or is it whom? Do they play well together? Do any of them jump out and say me, me, me.....or are they a nice, cohesive grouping? Notice that most of my prints are small-scale prints. My centers usually have the largest scale. When I shop for fabric, I always look for "different" colors, like the teals you see here. I try to find fabrics that have more than three colors too. Since I usually make scrappy quilts, fabrics with three colors make it easier for me to match them up with something else.

Lay them out on your block layout chart.

Don't stitch the corner sections on like this. Have the 4-patch in the center with the beige background rectangles along the outside of the block. On my first Country Charmer, I didn't realize I had one section turned around until the quilt was on the long-arm and half quilted. Oh well, no one knows but me.....and now you and the rest of the planet!

Except for the waviness of the herringbone fabric, I like this block a lot. It looks wonky here but not in the grand scheme of things.

Move on to another grouping. If they look good here.....

....they will look good here. Get lots of movement going just like the fabric in the star around the center square.

Play with your fabrics. Play until you are tired of playing. Swap out one fabric for another until you are happy. Wait a minute.....wait just one minute. Why did I put that red fabric in there? It's not in the center square. I put it there because I like it and think it looks good. It has just a hint of the gold and works with the blues.

The blocks become addictive. You eat, sleep and dream Country Charmer blocks and you can't wait until you can get back to your sewing room to put some more blocks together. Right? (Please tell me I'm right or else I'll sound like an idiot!)

I hope you are all enjoying yourselves and your Country Charmer journey. Enjoy the process, the whole experience. You are honing your skills from fabric selection to piecing 53 little pieces of fabric together into an 8-1/2" block along with lots and lots of other quilters around the world. In a word, AMAZING! Be amazed......I am. You can't hit every block out of the park, but you can have fun trying. I'm cheering for you.
Remember if you don't have a blog and would like everyone to see your blocks, you can email them to me at patched55@comcast.net and I'll post them for you. Or you can post them to Flickr HERE. Please check out Lesley The Cuddle Quilter. Lesley is going to post a Linky tomorrow, Feb 1st on her blog. You can see who's making Country Charmer around the globe.
Soon,
Lynn
P.S. There are lots of Country Charmer patterns available at the shop if you want to jump on the Country Charmer Quilt Along. This is a no stress, no designated quilting day, low-key event, just work on it when you can quilt along. The goal is to have a quilt finished by the end of November.
Dear Lynn, l am a new fan of you and your beautiful work. This morning l had a dream that l saw lots of Moda fabric and you writing about a new quilt along. You even had blocks laid out and could not chose your favorite. Then l woke up so disapointed that it was only a dream.
ReplyDeleteI would love to do this quilt along. But, I am in the midst of job searching and relocating to a new state. I love how you gave examples how to pick out fabric colors for the blocks. Excellent photos. If I get moved, and settled in, I may try to do this block on my own. This is a lovely quilt block. Thanks for the teaching lesson.
ReplyDeleteMaking these blocks is totally addicting!! I promised myself I would make one a day....but I can't stop at just one. Perhaps I could make a slipcover for my house!! :)
ReplyDeleteBeautiful, astounding and amazing! How I wish there were more hours in the day.
ReplyDeleteI love your idea of using the pasta drying rack. It houses a lot of strips in a small area. Is the rack handmade or purchased? My search on Google does not show one like yours.
ReplyDeletei love your blocks but the sashing what size to use on 12:inch block thanks
ReplyDeleteEach strip of the 3 piece sashing is 1" wide for an 8" block. For a 16" block, the sashing would be 2" wide. For a 12" block, the sashing strips would be 1.5" wide.
ReplyDeletethis quilt is on my bucket list.....how would you make it into a queen size quilt
ReplyDeleteLots of blocks!;-)
ReplyDeleteIs there a way to get this pattern in 12 inch finished block??
ReplyDeleteWhere do you get this pattern?
ReplyDeleteThank you so much for making this available, it's going to be a great help.
ReplyDelete